Discover the Gateway to Infinite Gaming Adventures
Are you ready to dive into a world where the price tag doesn’t dictate your gaming experience? Brace yourselves, gamers, because a secret portal to a treasure trove of free Steam games has been uncovered!
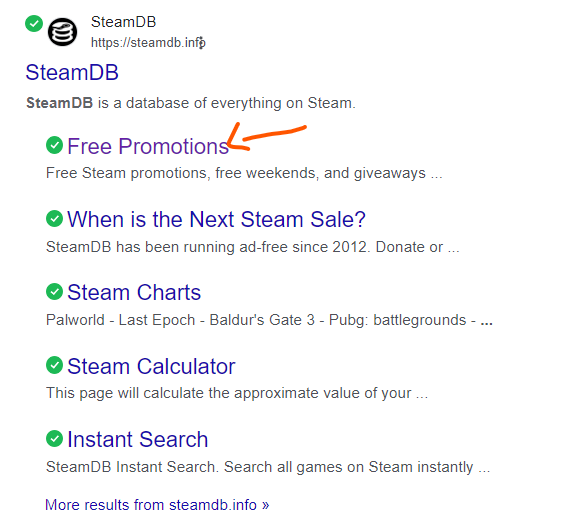
The Game Changer: SteamDB’s Free Promotions Page
Access Paid Games for Free: SteamDB’s Game-Changing Offerings
Introducing SteamDB, the game-changer in the realm of digital gaming. This clandestine website holds the key to a plethora of free Steam promotions, weekend delights, and jaw-dropping giveaways.
A Sneak Peek into the Process
How to Download Games for Free Legally: A Step-by-Step Guide
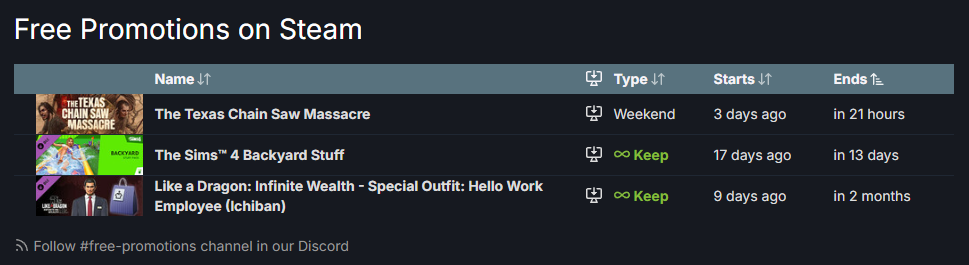
The process is surprisingly simple. By visiting SteamDB’s Free Promotions page (https://steamdb.info/), gamers can access a treasure trove of free games, including demos and full versions.
The catch? These games are available for a limited time window, so swift action is essential.
How Does it Work?
Unleash the Power: Activate Paid Games for Free with SteamDB
Utilizing SteamDB’s innovative tool, gamers can activate a myriad of free-to-play games directly on their Steam account. This means snagging games within the specified window ensures they remain in your library forever, offering endless hours of gaming bliss.
The Warning: Proceed with Caution
Free Games, Boundless Fun: But a Word of Caution
While the allure of thousands of free games is undeniably tempting, there’s a caveat. Activating numerous games may clutter your Steam library, making navigation a tad cumbersome. However, fear not! SteamDB provides solutions to manually and automatically manage your game keys.
The Verdict: Worth the Effort?
Are Free Games Worth the Effort? A Gamer’s Dilemma
With thousands of games at your fingertips, the question arises: is it worth it? While the process may be time-consuming, the payoff is undeniable. Gamers across the globe are seizing this opportunity to expand their gaming repertoire without spending a dime.
Unlock Your Gaming Potential Today!
Step into the Realm: Download Steam Games for Free Today!
Are you ready to embark on this epic gaming journey? Head over to SteamDB’s Free Promotions page, brace yourself for an adrenaline rush, and unlock a world of gaming wonders—all for free!
Conclusion
Redefine Gaming: Download Steam Games for Free Legally in 2024
In a world where gaming budgets often limit the scope of our adventures, SteamDB emerges as a beacon of hope, offering gamers the chance to explore, conquer, and triumph without emptying their wallets. Dive into the realm of free gaming and redefine what it means to be a true gamer in 2024!
Google Analytics is powerful analytics software. A common way to use it is to just slap the JavaScript snippet on every page template you have and let it collect basic data about unique visitors and pageviews and such. That’s useful, but it’s also the bare minimum. Say there is an important button on your site. Leveling up, you could send custom events to track users clicking on that button. Those are the analytics that matter the most.
Further down that road is tracking eCommerce analytics. This is extra-tricky, as it requires you sending events to Google Analytics for sales, instances of adding/removing things from cart, views on products… all sorts of stuff. If you don’t do all that (and do it right), you don’t get good analytics information.
Yet another reason I like WooCommerce! Instead of this analytics integration being a monumental effort and a substantial bit of technical debt to maintain, you just install the WooCommerce Google Analytics plugin and… that’s it. Also: it’s free.
I’ve had this integrated for months right here on CSS-Tricks, and I can confirm:
It was close to zero effort.
It just works.
The plugin installed and activated! The one bit of config is adding this ID, which is easy to find in Google Analytics, your own code, or another Google Analytics plugin.
Now, to be clear, WooCommerce has its own analytics built right in. If what you are interested in is sales reports and top sellers and stuff like that, those are the dashboards I’d be looking at. But there are some things that the built-in WooCommerce analytics just don’t do. For example, I can check out the sales funnel on Google Analytics now:
30 days of traffic starting from all unique visitors to sessions where they actually bought something.
CSS-Tricks isn’t exactly an eCommerce-focused website, so the funnel there starts super wide and gets super (super) tiny — but hey, at least I can confirm that and see it with my own eyes. Plus, I can glean some insights here, like the fact that 66/70 people completed checkout once they got there (pretty good), but only 70/525 even proceeded to checkout after adding to cart, so I’m losing a lot of people at that stage.
Here is some more interesting data that only Google Analytics knows:
Of 66 sales, 56 of them came from returning visitors, not new visitors. So people tend to not buy on first look, but do come back later. I’m not sure if that means I should be making things more enticing for those new visitors or if I should lean into reminding people about it after they’ve looked at it. Either way, now I know because I have the data.
There is data in the WooCommerce analytics that I’d normally have to go to Google Analytics to see. I can see individual orders. I can see what the top sellers are and compare product sales over different time periods. All useful stuff, and you might appreciate having all this in one place.
Again, my favorite part about this is having all this data. It feels like it should have been hard-won to get, but all it took was clicking a few buttons. That’s why I never regret just doing things the standard WordPress and WooCommerce way! Things tend to just work!
I believe that a traditional WordPress theme should be able to work as effectively as a static site or a headless web app. The overwhelming majority of WordPress websites are built with a good ol’ fashioned WordPress theme. Most of them even have good caching layers, and dependency optimizations that make these sites run reasonably fast. But as developers, we have accomplished ways to create better results for our websites. Using a headless WordPress has allowed many sites to have faster load speeds, better user interactions, and seamless transitions between pages.
The problem? Maintenance. Let me show you another possibility!
Let’s start by defining what I mean by “Traditional” WordPress, “Headless” WordPress, and then “Nearly Headless” WordPress.
Traditional WordPress websites
Traditionally, a WordPress website is built using PHP to render the HTML markup that is rendered on the page. Each time a link is clicked, the browser sends another request to the server, and PHP renders the HTML markup for the site that was clicked.
This is the method that most sites use. It’s the easiest to maintain, has the least complexity in the tech, and with the right server-side caching tools it can perform fairly well. The issue is, since it is a traditional website, it feels like a traditional website. Transitions, effects, and other stylish, modern features tend to be more difficult to build and maintain in this type of site.
Pros:
The site is easy to maintain.
The tech is relatively simple.
There is great compatibility with WordPress plugins.
Cons:
Your site may feel a little dated as society expects app-like experiences in the browser.
JavaScript tends to be a little harder to write and maintain since the site isn’t using a JavaScript framework to control the site’s behavior.
Traditional websites tend to run slower than headless and nearly headless options.
Headless WordPress websites
A headless WordPress website uses modern JavaScript and some kind of server-side RESTful service, such as the WordPress REST API or GraphQL. Instead of building, and rendering the HTML in PHP, the server sends minimal HTML and a big ol’ JavaScript file that can handle rendering any page on the site. This method loads pages much faster, and opens up the opportunity to create really cool transitions between pages, and other interesting things.
No matter how you spin it, most headless WordPress websites require a developer on-hand to make any significant change to the website. Want to install a forms plugin? Sorry, you probably need a developer to set that up. Want to install a new SEO plugin? Nope, going to need a developer to change the app. Wanna use that fancy block? Too bad — you’re going to need a developer first.
Pros:
The website itself will feel modern, and fast.
It’s easy to integrate with other RESTful services outside of WordPress.
The entire site is built in JavaScript, which makes it easier to build complex websites.
Cons:
You must re-invent a lot of things that WordPress plugins do out of the box for you.
This set up is difficult to maintain.
Compared to other options, hosting is complex and can get expensive.
See “WordPress and Jamstack” for a deeper comparison of the differences between WordPress and static hosting.
I love the result that headless WordPress can create. I don’t like the maintenance. What I want is a web app that allows me to have fast load speeds, transitions between pages, and an overall app-like feel to my site. But I also want to be able to freely use the plugin ecosystem that made WordPress so popular in the first place. What I want is something headless-ish. Nearly headless.
I couldn’t find anything that fit this description, so I built one. Since then, I have built a handful of sites that use this approach, and have built the JavaScript libraries necessary to make it easier for others to create their own nearly headless WordPress theme.
Introducing Nearly Headless WordPress
Nearly headless is a web development approach to WordPress that gives you many of the app-like benefits that come with a headless approach, as well as the ease of development that comes with using a traditional WordPress theme. It accomplishes this with a small JavaScript app that will handle the routing and render your site much like a headless app, but has a fallback to load the exact same page with a normal WordPress request instead. You can choose which pages load using the fallback method, and can inject logic into either the JavaScript or the PHP to determine if the page should be loaded like this.
You can see this in action on the demo site I built to show off just what this approach can do.
For example, one of the sites implementing this method uses a learning management system called LifterLMS to sell WordPress courses online. This plugin has built-in e-commerce capabilities, and sets up the interface needed to host and place course content behind a paywall. This site uses a lot of LifterLMS’s built-in functionality to work — and a big part of that is the checkout cart. Instead of re-building this entire page to work inside my app, I simply set it to load using the fallback method. Because of this, this page works like any old WordPress theme, and works exactly as intended as a result — all without me re-building anything.
Pros:
This is easy to maintain, when set-up.
The hosting is as easy as a typical WordPress theme.
The website feels just as modern and fast as a headless website.
Cons:
You always have to think about two different methods to render your website.
There are limited choices for JavaScript libraries that are effective with this method.
This app is tied very closely to WordPress, so using third party REST APIs is more-difficult than headless.
How it works
For something to be nearly headless, it needs to be able to do several things, including:
load a page using a WordPress request,
load a page using JavaScript,
allow pages to be identical, regardless of how they’re rendered,
provide a way to know when to load a page using JavaScript, or PHP, and
Ensure 100% parity on all routed pages, regardless of if it’s rendered with JavaScript or PHP.
This allows the site to make use of progressive enhancement. Since the page can be viewed with, or without JavaScript, you can use whichever version makes the most sense based on the request that was made. Have a trusted bot crawling your site? Send them the non-JavaScript version to ensure compatibility. Have a checkout page that isn’t working as-expected? Force it to load without the app for now, and maybe fix it later.
To accomplish each of these items, I released an open-source library called Nicholas, which includes a pre-made boilerplate.
Keeping it DRY
The biggest concern I wanted to overcome when building a nearly-headless app is keeping parity between how the page renders in PHP and JavaScript. I did not want to have to build and maintain my markup in two different places — I wanted a single source for as much of the markup as possible. This instantly limited which JavaScript libraries I could realistically use (sorry React!). With some research, and a lot of experimentation, I ended up using AlpineJS. This library kept my code reasonably DRY. There’s parts that absolutely have to be re-written for each one (loops, for example), but most of the significant chunks of markup can be re-used.
A single post template rendered with PHP might look like something like this:
Both of them use the same PHP template, so all of the code inside the actual loop is DRY:
$title   = $template->get_param( 'title', '' );

// Get the title that was passed into this template, fallback to empty string.
$content = $template->get_param( 'content', '' ); // Get the cotent passed into this template, fallback to empty string.

?>
<article x-data="theme.Post(index)">
  <!-- This will use the alpine directive to render the title, or if it's in compatibility mode PHP will fill in the title directly -->
  <h1 x-html="title"><?= $title ?></h1>
  <!-- This will use the Alpine directive to render the post content, or if it's in compatibility mode, PHP will fill in the content directly -->
  <div class="content" x-html="content"><?= $content ?></div>
</article>
Detect when a page should run in compatibility mode
“Compatibility mode” allows you to force any request to load without the JavaScript that runs the headless version of the site. When a page is set to load using compatibility mode, the page will be loaded using nothing but PHP, and the app script never gets enqueued. This allows “problem pages” that don’t work as-expected with the app to run without needing to re-write anything.
There are several different ways you can force a page to run in compatibility mode — some require code, and some don’t. Nicholas adds a toggle to any post type that makes it possible to force a post to load in compatibility mode.
Along with this, you can manually add any URL to force it to load in compatibility mode inside the Nicholas settings.
These are a great start, but I’ve found that I can usually detect when a page needs to load in compatibility mode automatically based on what blocks are stored in a post. For example, let’s say you have Ninja Forms installed on your site, and you want to use the validation JavaScript they provide instead of re-making your own. In this case, you would have to force compatibility mode on any page that has a Ninja Form on it. You could manually go through and add each URL as you need them, or you can use a query to get all of the content that has a Ninja Forms block on the page. Something like this:
That automatically adds any page with a Ninja Forms block to the list of URLs that will load using compatibility mode. This is just using WP_Query arguments, so you could pass anything you want here to determine what content should be added to the list.
Extending the app
Under the hood, Nicholas uses a lightweight router that can be extended using a middleware pattern much like how an Express app handles middleware. When a clicked page is routed, the system runs through each middleware item, and eventually routes the page. By default, the router does nothing; however, it comes with several pre-made middleware pieces that allows you to assemble the router however you see-fit.
A basic example would look something like this:
// Import WordPress-specific middleware
import {
  updateAdminBar,
  validateAdminPage,
  validateCompatibilityMode
} from 'nicholas-wp/middlewares'

// Import generic middleware
import {
  addRouteActions,
  handleClickMiddleware,
  setupRouter,
  validateMiddleware
} from "nicholas-router";

// Do these actions, in this order, when a page is routed.
addRouteActions(
  // First, validate the URL
  validateMiddleware,
  // Validate this page is not an admin page
  validateAdminPage,
  // Validate this page doesn't require compatibility mode
  validateCompatibilityMode,
  // Then, we Update the Alpine store
  updateStore,
  // Maybe fetch comments, if enabled
  fetchComments,
  // Update the history
  updateHistory,
  // Maybe update the admin bar
  updateAdminBar
)

// Set up the router. This also uses a middleware pattern.
setupRouter(
  // Setup event listener for clicks
  handleClickMiddleware
)
From here, you could extend what happens when a page is routed. Maybe you want to scan the page for code to highlight, or perhaps you want to change the content of the <head> tag to match the newly routed page. Maybe even introduce a caching layer. Regardless of what you need to-do, adding the actions needed is as simple as using addRouteAction or setupRouter.
Next steps
This was a brief overview of some of the key components I used to implement the nearly headless approach. If you’re interested in going deeper, I suggest that you take my course at WP Dev Academy. This course is a step-by-step guide on how to build a nearly headless WordPress website with modern tooling. I also suggest that you check out my nearly headless boilerplate that can help you get started on your own project.
This post was in progress before Automattic acquired Frontity and its entire team. According to Frontity’s founders, the framework will be transitioned into a community-led project and leave the project in “a stable, bug-free position” with documentation and features. Like other open-source community projects, Frontity will remain free as it has been, with opportunities to contribute to the project and make it an even better framework for decoupled WordPress. More detail is found in this FAQ page.
In my previous article, we created a headless WordPress site with Frontity and briefly looked at its file structure. In this companion article, we will go into a deep dive of the @frontity/mars-theme package, or Mars Theme, with a step-by-step walkthrough on how to customize it to make our own. Not only is the Mars Theme a great starter, it’s Frontity’s default theme — sort of like WordPress Twenty Twenty-One or the like. That makes it a perfect starting point for us to get hands-on experience with Frontity and its features.
Specifically, we will look at the fundamental parts of Frontity’s Mars Theme, including what they call “building blocks” as well as the different components that come with the package. We’ll cover what those components do, how they work, and finally, how styling works with examples.
Let’s revisit the file structure of the Frontity project we made in the last article as that shows us exactly where to find Frontity’s building blocks, the frontity.settings.js, and package.json and packages/mars-theme folder. We covered these is great detail before but, in particular, the package.json file gives us a lot of information about the project, like the name, description, author, dependencies, etc. Here’s what that file includes:
frontity: this is the main package that includes all the methods used in Frontity app development. It’s also where the CLI lives.
@frontity/core: This is the most important package because it takes care of all the bundling, rendering, merging, transpiling, serving, etc. We don’t need to access to it in order to develop a Frontity app. The full list is captured in the Frontity docs.
@frontity/wp-source:This package connects to the WordPress REST API of our site and fetches all the data needed in the Mars Theme.
@frontity/tiny-router:This package handles window.history and helps us with routing.
@frontity/htmal2react:This package converts HTML to React, working with processors that match HTML portions while replacing them with React components.
Frontity core, or @frontity/package (also referred as Frontity’s building block), is composed of useful React component libraries in its @frontity/components package, which exports helpful things like Link, Auto Prefetch, Image, Props, Iframe, Switch, and other functions, objects, etc., that can be directly imported into Frontity project components. A more detailed description of these components—including syntax info use cases—is in this package reference API.
When starting frontity, all the packages defined in frontity.settings.js are imported by @frontity/file-settings and the settings and exports from each package are merged by @frontity/core into a single store where you can access the state and actions of the different packages during development using @frontity/connect, the frontity state manager.
Next up, we’re familiarizing ourselves with how these building blocks, utilities and exports are used in the Mars Theme package to create a functioning Frontity project with a headless WordPress endpoint.
Section 1: Digging into the Mars Theme
Before discussing styling and customizing let’s briefly familiarize ourselves with the Mars Theme (@frontity/mars-theme) file structure and how it is put together.
The Mars Theme has three important component files: /src/index.js file, src/list/index.js and src/components/index.js. Frontity’s documentation is a great resource for understanding the Mars Theme, with especially great detail on how different Mars Theme components are defined and connected together in a Frontity site. Let’s start familiarizing ourselves with the theme’s three most important components: Root, Theme and List.
Theme Root component (/src/index.js)
The src/index.js file, also known as the theme’s Root, is one of the most important Mars Theme components. The Root serves as an entry point that targets <div id="root"> in the site markup to inject the roots of all the installed packages required to run a Frontity project. A Frontity theme exports a root and other required packages in the DOM as shown in the following use case example from the Frontity documentation:
This is everything the package pulls in when initializing the Root component:
// mars-theme/src/components/index.js
import Theme from "./components";
// import processor libraries
import image from "@frontity/html2react/processors/image";
import iframe from "@frontity/html2react/processors/iframe";
import link from "@frontity/html2react/processors/link";

const marsTheme = {
  // The name of the extension
  name: "@frontity/mars-theme",
  // The React components that will be rendered
  roots: {
    /** In Frontity, any package can add React components to the site.
      * We use roots for that, scoped to the `theme` namespace. */
    theme: Theme,
  },
  state: {
    /** State is where the packages store their default settings and other
      * relevant state. It is scoped to the `theme` namespace. */
    theme: {
      autoPrefetch: "in-view",
      menu: [],
      isMobileMenuOpen: false,
      featured: {
        showOnList: false,
        showOnPost: false,
      },
    },
  },

  /** Actions are functions that modify the state or deal with other parts of
    * Frontity-like libraries. */
  actions: {
    theme: {
      toggleMobileMenu: ({ state }) => {
        state.theme.isMobileMenuOpen = !state.theme.isMobileMenuOpen;
      },
      closeMobileMenu: ({ state }) => {
        state.theme.isMobileMenuOpen = false;
      },
    },
  },
  /** The libraries that the extension needs to create in order to work */
  libraries: {
    html2react: {
      /** Add a processor to `html2react` so it processes the `<img>` tags
        * and internal link inside the content HTML.
        * You can add your own processors too. */
      processors: [image, iframe, link],
    },
  },
};

export default marsTheme;
The Mars Theme root component exports packages that includes any of the roots, fills, state, actions and libraries elements. More detailed information on Root can be found in this Frontity doc.
Theme component (/src/components/index.js)
The Frontity Theme component is its main root level component that is exported by the Theme namespace (lines 12-16, highlighted in the previous example. The Theme component is wrapped with the @frontity/connect function (line 51, highlighted below) which provides access to its state, actions and libraries props from the Root component instance and allows Theme component to read the state, manipulate through actions, or use code from other features packages in the libraries.
// mars-theme/src/components/index.js
import React from "react"
// Modules from @emotion/core, @emotion/styled, css, @frontity/connect, react-helmet
import { Global, css, connect, styled, Head } from "frontity";
import Switch from "@frontity/components/switch";
import Header from "./header";
import List from "./list";
import Post from "./post";
import Loading from "./loading";
import Title from "./title";
import PageError from "./page-error";

/** Theme is the root React component of our theme. The one we will export
 * in roots. */
const Theme = ({ state }) => {
  // Get information about the current URL.
  const data = state.source.get(state.router.link);

  return (
    <>
      {/* Add some metatags to the <head> of the HTML with react-helmet */}
      <Title />
      <Head>
        <meta name="description" content={state.frontity.description} />
        <html lang="en" />
      </Head>

      {/* Add some global styles for the whole site, like body or a's.
      Not classes here because we use CSS-in-JS. Only global HTML tags. */}
      <Global styles={globalStyles} />

      {/* Render Header component. Add the header of the site. */}
      <HeadContainer>
        <Header />
      </HeadContainer>

      {/* Add the main section. It renders a different component depending
      on the type of URL we are in. */}
      <Main>
        <Switch>
          <Loading when={data.isFetching} />
          <List when={data.isArchive} />
          <Post when={data.isPostType} />
          <PageError when={data.isError} />
        </Switch>
      </Main>
    </>
  );
};

export default connect(Theme);

{/* define Global styles and styled components used Theme component here */}
const globalStyles = css`
  body {
    margin: 0;
    font-family: -apple-system, BlinkMacSystemFont, "Segoe UI", Roboto,
      "Droid Sans", "Helvetica Neue", Helvetica, Arial, sans-serif;
  }
  a,
  a:visited {
    color: inherit;
    text-decoration: none;
  }
`;
const HeadContainer = styled.div`
  // ...
`;

const Main = styled.div`
  // ...
`;
This example is pulled directly from the Mars Theme’s /src/components/index.js component, which we imported with connect from frontity (line 4, above). We are using state.source.get() to retrieve data to be rendered from the current path (lines 39-46, highlighted above); for example, List, Post and other components.
Section 2: Working with the List component
What we just looked at are the theme-level components in Frontity’s Mars Theme. You may have noticed that those components import additional components. Let’s look at a specific one of those, the List component.
The List component is exported by src/components/list/index.js which uses @loadable/components to split the List component code in such a way that the component only loads when a user clicks a List view; otherwise it won’t render at all, like when a Post view is clicked instead.
// src/components/list/index.js
import { loadable } from "frontity";

// Codesplit the list component so it's not included if the users
// load a post directly.
export default loadable(() => import("./list"));
In this example, Frontity utilizes loadble functions (integrated from Loadable components) for code splitting which loads a component asynchronously and separates code into different bundles that are dynamically loaded at run time. Frontity’s core package API reference goes into much more detail.
Displaying lists of posts
To display a list of posts in an archive page, we first have to look Frontity src/components/list/list.js component. As the name suggests, the List component renders lists of posts using state.source.get(link) and its items field (lines 22-25, highlighted below).
// src/components/list/list.js
import { connect, styled, decode } from "frontity";
import Item from "./list-item";
import Pagination from "./pagination";

const List = ({ state }) => {
  // Get the data of the current list.
  const data = state.source.get(state.router.link);
  return (
    <Container>
      {/* If the list is a taxonomy, we render a title. */}
      {data.isTaxonomy && (
        <Header>
          {data.taxonomy}: {state.source[data.taxonomy][data.id].name}
        </Header>
      )}
      {/* If the list is an author, we render a title. */}
      {data.isAuthor && (
        <Header>Author: {state.source.author[data.id].name}</Header>
      )}
      {/* Iterate over the items of the list. */}
      {data.items.map(({ type, id }) => {
        const item = state.source[type][id];
        // Render one Item component for each one.
        return <Item key={item.id} item={item} />;
      })}
      <Pagination />
    </Container>
  );
};
export default connect(List);
In the code example above, the connect function is imported by frontity in line 2 and is wrapped around the exported connect(List) component in line 31 (the last line). Two other components, list-item.js and pagination.js are also imported. Let’s look at those next!
Here’s what we have for list-item.js:
// src/components/list/list-item.js
import { connect, styled } from "frontity";
import Link from "../link";
import FeaturedMedia from "../featured-media";

const Item = ({ state, item }) => {
  const author = state.source.author[item.author];
  const date = new Date(item.date);
  return (
    <article>
     {/* Rendering clickable post Title */}
      <Link link={item.link}>
        <Title dangerouslySetInnerHTML={{ __html: item.title.rendered }} />
      </Link>
      <div>
        {/* If the post has an author, we render a clickable author text. */}
        {author && (
          <StyledLink link={author.link}>
            <AuthorName>
              By <b>{author.name}</b>
            </AuthorName>
          </StyledLink>
        )}
        {/* Rendering post date */}
        <PublishDate>
          {" "}
          on <b>{date.toDateString()}</b>
        </PublishDate>
      </div>
      {/* If the want to show featured media in the
       * list of featured posts, we render the media. */}
      {state.theme.featured.showOnList && (
        <FeaturedMedia id={item.featured_media} />
      )}
      {/* If the post has an excerpt (short summary text), we render it */}
      {item.excerpt && (
        <Excerpt dangerouslySetInnerHTML={{ __html: item.excerpt.rendered }} />
      )}
    </article>
  );
};
// Connect the Item to gain access to `state` as a prop
export default connect(Item);
The Item component renders the preview of a blog post with clickable post title (lines, 12-14, highlighted above), author name (lines 19-21, highlighted above) and published date (lines: 25-28, highlighted above) along with <FeaturedMedia /> which serves as a post’s optional featured image.
Paginating a list of posts
Let’s look at thePagination component that was rendered earlier in the List component by the src/components/list/pagination/js that follows:
// src/components/list/pagination.js
import { useEffect } from "react";
import { connect, styled } from "frontity";
import Link from "../link";

const Pagination = ({ state, actions }) => {
  // Get the total posts to be displayed based for the current link
  const { next, previous } = state.source.get(state.router.link);
  // Pre-fetch the the next page if it hasn't been fetched yet.
  useEffect(() => {
    if (next) actions.source.fetch(next);
  }, []);
  return (
    <div>
      {/* If there's a next page, render this link */}
      {next && (
        <Link link={next}>
          <Text>← Older posts</Text>
        </Link>
      )}
      {previous && next && " - "}
      {/* If there's a previous page, render this link */}
      {previous && (
        <Link link={previous}>
          <Text>Newer posts →</Text>
        </Link>
      )}
    </div>
  );
};
/**
 * Connect Pagination to global context to give it access to
 * `state`, `actions`, `libraries` via props
 */
export default connect(Pagination);
The Pagination component is used so that users can paginate between lists of posts — you know, like navigating forward from Page 1 to Page 2, or backward from Page 2 to Page 1. The state, actions, libraries props are provided by the global context that wraps and exports them with connect(Pagination).
Displaying single posts
The Post component displays both single posts and pages. Indeed, structurally both are the same except, in posts, we usually display meta data (author, date, categories etc). Meta data isn’t usually used in pages.
In this Post component, conditional statements are rendered only if the post object contains data (i.e. data.isPost) and a featured image is selected in sate.theme.featured in the theme’s root component:
// src/components/post.js
import { useEffect } from "react";
import { connect, styled } from "frontity";
import Link from "./link";
import List from "./list";
import FeaturedMedia from "./featured-media";

const Post = ({ state, actions, libraries }) => {
  // Get information about the current URL.
  const data = state.source.get(state.router.link);
  // Get the data of the post.
  const post = state.source[data.type][data.id];
  // Get the data of the author.
  const author = state.source.author[post.author];
  // Get a human readable date.
  const date = new Date(post.date);
  // Get the html2react component.
  const Html2React = libraries.html2react.Component;

  useEffect(() => {
    actions.source.fetch("/");
    {/* Preloading the list component which runs only on mount */}
    List.preload();
  }, []);

  // Load the post, but only if the data is ready.
  return data.isReady ? (
    <Container>
      <div>
        <Title dangerouslySetInnerHTML={{ __html: post.title.rendered }} />
        {/* Only display author and date on posts */}
        {data.isPost && (
          <div>
            {author && (
              <StyledLink link={author.link}>
                <Author>
                  By <b>{author.name}</b>
                </Author>
              </StyledLink>
            )}
            <DateWrapper>
              {" "}
              on <b>{date.toDateString()}</b>
            </DateWrapper>
          </div>
        )}
      </div>
      {/* Look at the settings to see if we should include the featured image */}
      {state.theme.featured.showOnPost && (
        <FeaturedMedia id={post.featured_media} />
      )}
      {/* Render the content using the Html2React component so the HTML is processed
       by the processors we included in the libraries.html2react.processors array. */}
      <Content>
        <Html2React html={post.content.rendered} />
      </Content>
    </Container>
  ) : null;
};
{/* Connect Post to global context to gain access to `state` as a prop. */}
export default connect(Post);
Section 3: Links, menus, and featured images
We just saw how important the List component is when it comes to displaying a group of posts. It’s what we might correlate to the markup we generally use when working with the WordPress loop for archive pages, latest posts feeds, and other post lists.
There are a few more components worth looking at before we get into Mars Theme styling.
The Link component (src/components/link.js)
The following MarsLink component comes from src/components/link.js, which is a wrapper on top of the {@link Link} component. It accepts the same props as the {@link Link} component.
// src/components/link.js
import { connect, useConnect } from "frontity";
import Link from "@frontity/components/link";

const MarsLink = ({ children, ...props }) => {
  const { state, actions } = useConnect();

  /** A handler that closes the mobile menu when a link is clicked. */
  const onClick = () => {
    if (state.theme.isMobileMenuOpen) {
      actions.theme.closeMobileMenu();
    }
  };

  return (
    <Link {...props} onClick={onClick} className={className}>
      {children}
    </Link>
  );
};
// Connect the Item to gain access to `state` as a prop
export default connect(MarsLink, { injectProps: false });
As explained in this tutorial, the Link component provides a link attribute that takes a target URL as its value. Quoting from the doc: it outputs an <a> element into the resulting HTML, but without forcing a page reload which is what would occur if you simply added an <a> element instead of using the Link component.
Frontity menu (src/components/nav.js)
Earlier, we defined values for menu items in the frontity.settings.js file. In the Nav component (located in src/components/nav/js) those menu item values are iterated over, match their page url, and display the component inside the Header component.
// src/components/nav.js
import { connect, styled } from "frontity";
import Link from "./link";

const Nav = ({ state }) => (
  <NavContainer>
    // Iterate over the menu exported from state.theme and menu items value set in frontity.setting.js
    {state.theme.menu.map(([name, link]) => {
      // Check if the link matched the current page url
      const isCurrentPage = state.router.link === link;
      return (
        <NavItem key={name}>
          {/* If link URL is the current page, add `aria-current` for a11y */}
          <Link link={link} aria-current={isCurrentPage ? "page" : undefined}>
            {name}
          </Link>
        </NavItem>
      );
    })}
  </NavContainer>
);
// Connect the Item to gain access to `state` as a prop
export default connect(Nav);
Featured Image component (/src/components/featured-media.js)
In Frontity, featured media items values are defined in the Root component ‘s theme.state.featured line that we discussed earlier. Its full code is available in the /src/components/featured-media.js component file.
Now that we’re more familiar with the Mars Theme, as well as its building blocks, components, and functions, we can move into the different approaches that are available for styling the Mars Theme front-end.
As we move along, you may find this Frontity doc a good reference for the various styling approaches we cover.
First off, Frontity provides us with reusable components made with with styled-components, and Emotion, a CSS library for styling components in JavaScript, right out of the box. Emotion is popular with React and JavaScript developers, but not so much in the WordPress community based on what I’ve seen. CSS-Tricks has covered CSS-in-JS in great detail including how it compares with other styling, and this video provides background information about the library. So, knowing that both styled-components and Emotion are available and ready to use is nice context as we get started.
I am new to the CSS-in-JS world, except for some general reading on it here and there. I was exposed to CSS-in-JS styling in a Gatsby project, but Gatsby provides a bunch of other styling options that aren’t readily available in Frontity or the Mars Theme. That said, I feel I was able to get around that lack of experience, and what I learned from my discovery work is how I’m going to frame things.
So, with that, we are going to visit a few styling examples, referencing Frontity’s styling documentation as we go in order to familiarize ourselves with even more information.
Using styled-components
As the name suggests, we need a component in order to style it. So, first, let’s create a styled-component using Emotion’s styled function.
Let’s say we want to style a reusable <Button /> component that’s used throughout our Frontity project. First, we should create a <Button /> component (where its div tag is appended with a dot) and then call the component with a template literal for string styles.
Now this <Button /> component is available to import in other components. Let’s look specifically at the Mars Theme<Header /> component to see how the styled-component is used in practice.
// mars-theme/src/components/header.js
import { connect, styled } from "frontity";
import Link from "./link";
import MobileMenu from "./menu";

const Header = ({ state }) => {
  return (
    <>
      <Container> // This component is defined later
        <StyledLink link="/"> // This component is defined later
          <Title>{state.frontity.title}</Title> // This component is defined later
        </StyledLink>
        // ...
      </Container>
    </>
  );
};

// Connect the Header component to get access to the `state` in its `props`
export default connect(Header);

// Defining the Container component that is a div with these styles
const Container = styled.div`
  width: 848px;
  max-width: 100%;
  box-sizing: border-box;
  padding: 24px;
  color: #fff;
  display: flex;
  flex-direction: column;
  justify-content: space-around;
`;
// Defining Title component that is h2 with these styles
const Title = styled.h2`
  margin: 0;
  margin-bottom: 16px;
`;
// Defining StyledLink component that is a third-party Link component
const StyledLink = styled(Link)`
  text-decoration: none;
`;
In the above code example, the <StyledLink /> component (lines 39-41, highlighted above) is used to style another component, <Link />. Similarly. the <Container /> and <Title /> styled-components are used to style the site title and the site’s main container width.
The Emotion docs describe how a styled component can be used as long as it accepts className props. This is a useful styling tool that can be extended using a variable as shown in the following example below from Frontity’s documentation:
// mars-theme/src/components/header.js
// ...
// We create a variable to use later as an example
Const LinkColor = "green";

// ...

// Defining StyledLink component that is a third-party Link component
const StyledLink = styled(Link)`
  text-decoration: none;
  Background-color: ${linkColor};
`;
The styled component above is used extensively in the Mars Theme. But before we go further, let’s look at using a CSS prop to style components.
Using a CSS prop
The css prop is available as a template literal for inline styling from the Frontity core package. It is similar to styled-components, except css does not return a React component but rather a special object that can be passed to a component through the css prop.
/* Using as CSS prop */
import { css } from "frontity";

const PinkButton = () => (
  <div css={css`background: pink`}>
    My Pink Button
  </div>
);
See that? We can style a component inline using the css prop on a component. Additional use case examples are available in the Emotion docs.
Using the <Global /> component
<Global /> is a React component that allows to us create site-wide general styles, though Frontity does not optimize it for performance. Global styles should be added to the <Theme /> root component.
// packages/mars-theme/src/components/index.js
// ...

import { Global, css, styled } from "frontity";
import Title from "./title";
import Header from "./header";
// ...

// Theme root
const Theme = ({ state }) => {
  // Get information about the current URL.
  const data = state.source.get(state.router.link);

  return (
   <>
     {/* Add some metatags to the <head> of the HTML. */}
      <Title />
        // ...
      {/* Add global styles */}
      <Global styles={globalStyles} />
      {/* Add the header of the site. */}
      <HeadContainer>
        <Header />
      </HeadContainer>
        // ...
   </>
  );
 };

export default connect(Theme);

const globalStyles = css`
  body {
    margin: 0;
    font-family: -apple-system, "Helvetica Neue", Helvetica, sans-serif;
  }
  a,
  a:visited {
    color: inherit;
    text-decoration: none;
  }
`;

const HeadContainer = styled.div`
  // ...
`;
The <Global /> component has a style attribute that takes a css function as its value and consists of standard CSS inside back ticks (lines 35-45, highlighted above) as template literals. Frontity recommends using global styles for globally-used HTML tags, like <html>, <body>, <a>, and <img>.
I did a lot of research heading into my Mars Theme project and thought I’d share some of the more useful resources I found for styling Frontity themes:
Official Frontity themes. In addition to the default Mars Theme, Frontity has a ready-to-use package that ports the default WordPress Twenty Twenty theme in its entirety to a Frontity project. You will notice in the next section that my style customizations were inspired by this great learning resource.
Community themes. At this time of this writing, there are a grand total of nine Frontity community members who contributed fully functional theme packages. Those themes can be cloned into your own project and customized according to your needs. Likewise, many of the sites included in the Frontity showcase have GitHub repository links, and just as we can copy or pick up design tips from WordPress themes, we can use these resources to customize our own Frontity theme by referencing these packages.
Creating your own theme from scratch.The Frontity tutorial site has an excellent step-by-step guide to create your own fully working and functional theme package from scratch. Although it’s a little time consuming to go through it all, it is the best approach to fully understand a Frontity site project.
Now that we have covered the more commonly used Frontity styling techniques, let’s apply what we’ve learned to start customizing our Mars Theme project.
Section 5: Customizing the Frontity Mars Theme
I’m going to share one of my working Frontity projects, where I took the Mars Theme as a base and modified it with the resources we’ve covered so far. Because this is my learning playground, I took time to learn from Frontity default themes, community themes and Frontity showcase sites.
So here are examples of how I customized Frontity’s Mars Theme for my headless WordPress site project.
First, I wanted to change the @frontity/mars-theme package name to something different. It’s a good idea to change the package name and make sure all of the dependencies in the package file are up to date. Luis Herrera outlines the required steps for renaming the Mars Theme package in this frontity community forum, which I used as a reference to go from @fontity/mars-theme package to @frontity/labre-theme.
So, open up the package.json file and change the name property on line 2. This is the name of the package that gets used throughout the project.
I renamed my project from mars-theme to labre-theme in my package.json file,.
We should also update the name of the project folder while we’re at it. We can do that on line 25. I changed mine from ./package/mars-theme to ./package/labre-theme. Now, the theme package is properly listed as a dependency and will be imported to the project.
Our frontity-settings.js file needs to reflect the name change. So, let’s open that up and:
rename the package name on line 13 (I changed mine from @frontity/mars-theme to @frontity/labre-theme), and
rename the name on line 3 (I changed mine from mars-demo to labre-demo).
Next up, we want to re-initialize the project with these changes. We should delete the node_modules folder with rm -rf node_modules in a terminal and reinstall the npm package with yarn install. Once the npm package is reinstalled, everything gets properly linked internally and our Frontity project runs just fine without any errors.
Refactoring navigation with dynamic menu fetching
As we discussed earlier, Frontity menu items are either hard-coded in the frontity.setting.js file or in index.js component that’s stored in the Frontity state. However, WordPress can dynamically fetch the Frontity menu. In fact, Frontity just so happens to have a YouTube video onthe subject. Let me break down the key steps here.
The first step is to install the WP-REST-API V2 Menus plugin in WordPress. The plugin is freely available in the WordPress Plugin Directory, which means you can find it and activate it directly from the WordPress admin.
Why do we need this plugin? It extends the new routes to all the registered WordPress menus to the REST API (e.g. /menus/v1/menus/<slug>).
If we check our project site at /wp-json/menu/v1/menus, it should display our selected menu items in the JSON. We can get the menu items with the menu item’s slug property.
Next, let’s use the menuHandler function from the tutorial. Create a new menu-handler.js file at src/components/handler/menu-handler.js and paste in the following code:
// src/components/handler/menu-handler.js
const menuHandler = {
  name: "menus",
  priority: 10,
  pattern: "/menu/:slug",
  func: async ({ link, params, state, libraries }) => {
    console.log("PARAMS:", params);
    const { slug } = params;

    // Fetch the menu data from the endpoint
    const response = await libraries.source.api.get({
      endpoint: `/menus/v1/menus/${slug}`,
    });

    // Parse the JSON to get the object
    const menuData = await response.json();

    // Add the menu items to source.data
    const menu = state.source.data[link];
    console.log(link);
    Object.assign(menu, {
      items: menuData.items,
      isMenu: true,
    });
  },
};

export default menuHandler;
This menuHandler function is only executed if the pattern value (i.e. /menu/:slug) matches. Now let’s update our /src/index.js root component so it imports the handler:
// src/index.js
import Theme from "./components";
import image from "@frontity/html2react/processors/image";
import iframe from "@frontity/html2react/processors/iframe";
import link from "@frontity/html2react/processors/link";
import menuHandler from "./components/handlers/menu-handler";

const labreTheme = {
  // ...
  state: {
    theme: {
      autoPrefetch: "in-view",
      menu: [],
      {/* Add menuURL property with menu slug as its value */}
      menuUrl: "primary-menu",
      isMobileMenuOpen: false,
      // ...
    },
  },

  /** Actions are functions that modify the state or deal with other parts of
    * Frontity-like libraries */
  actions: {
    theme: {
      toggleMobileMenu: ({ state }) => {
        state.theme.isMobileMenuOpen = !state.theme.isMobileMenuOpen;
      },
      closeMobileMenu: ({ state }) => {
        state.theme.isMobileMenuOpen = false;
      },
      {/* Added before SSR action */}
      beforeSSR: async ({ state, actions }) => {
        await actions.source.fetch(`/menu/${state.theme.menuUrl}/`);
      },
    },
  },
  libraries: {
    // ...
    {/* Added menuHandler source */}
    source: {
      handlers: [menuHandler],
    },
  },
};

export default labreTheme;
Add an array of handlers under the source property and fetch data before the beforeSSR function. It does not fetch but does match the menu-handler slug, which means menuHandler() is executed. That puts the menu items into state and they become available to manipulate.
Please note that we have added a new menuUrl property here (line 15 above) which can be used as a variable at our endpoint in handlers, as well as the nav.js component. Then, changing the value of menuUrl in the index.js root component, we could display another menu.
Let’s get this data into our theme through state and map with menu-items to display on the site.
// src/components/nav.js
import { connect, styled } from "frontity";
import Link from "./link";

/** Navigation Component. It renders the navigation links */
const Nav = ({ state }) => {
  {/* Define menu-items constants here */}
  const items = state.source.get(`/menu/${state.theme.menuUrl}/`).items;

  return (
  <NavContainer>
    {items.map((item) => {
       return (
        <NavItem key={item.ID}>
           <Link link={item.url}>{item.title}</Link>
         </NavItem>
      );
    })}
  </NavContainer>
  );
};

export default connect(Nav);

const NavContainer = styled.nav`
  list-style: none;
  // ...
If we change our menu slug here and in index.js, then we get a different menu. To view dynamic menu items in mobile view, we should similarly update menu-modal.js components as well.
Additionally, the tutorial describes how to fetch nested menus as well, which you can learn from the tutorial video, starting at about 18:09.
Modifying the file structure
I decided to restructure my Labre (formerly known as Mars) theme folder. Here’s how it looks after the changes:
As you can see, I added separate folders for pages, styles, headers, posts, and images. Please take a note that we have to update file paths in index.js and other related components anytime we change the way files and folders are organized. Otherwise, they’ll be pointing to nothing!
Adding a custom footer component
You may have noticed that the original Mars Theme folder structure includes neither a footer component, nor a separate page component. Let’s make those components to demonstrate how our new folder structure works.
We can start with the page component. The Mars Theme generates both pages and posts with the posts.js component by default — that’s because pages and posts are essentially the same except that posts have meta data (e.g. authors, date, etc.) and they can get away with it. But we can separate them for our own needs by copying the code in posts.js and pasting it into a new pages.js file in our /pages folder.
// src/components/pages/page.js
import React, { useEffect } from "react";
import { connect, styled } from "frontity";
import List from "../list";

const Page = ({ state, actions, libraries }) => {
  // Get information about the current URL.
  const data = state.source.get(state.router.link);
  // Get the data of the post.
  const page = state.source[data.type][data.id];
  //  ...
  // Load the page, but only if the data is ready.
  return data.isReady ? (
    <Container>
      <div className="post-title">
        <Title dangerouslySetInnerHTML={{ __html: page.title.rendered }} />
      </div>

      {/* Render the content using the Html2React component so the HTML is processed by the processors we included in the libraries.html2react.processors array. */}
      <Content>
        <Html2React html={page.content.rendered} />
      </Content>
    </Container>
  ) : null;
};
// Connect the Page component to get access to the `state` in its `props`
export default connect(Page);

// Copy styled components from post.js except, DateWrapper
const Container = styled.div`
    width: 90vw;
    width: clamp(16rem, 93vw, 58rem);
    margin: 0;
    padding: 24px;
`
// ..
All we did here was remove the meta data from post.js (lines 31-34 and 55-76) and the corresponding styled components. Just as we did with the Mars Theme /list folder, we should export the loadable function in both the pages and posts folders to code split the <List /> component. This way, the <List /> component isn’t displayed if a user is on a single post.
// src/components/pages/index.js
import { loadable } from "frontity";

/** Codesplit the list component so it's not included
*   if the users load a post directly. */
export default loadable(() => import("./page"));
Next, we should update path url of /src/components/index.js component as shown below:
// src/components/index.js
import { Global, css, connect, styled, Head } from "frontity";
import Switch from "@frontity/components/switch";
import Header from "./header/header";
import List from "./list";
import Page from "./pages/page";
import Post from "./posts/post";
import Loading from "./loading";
import Title from "./title";
import PageError from "./page-error";

/** Theme is the root React component of our theme. The one we will export
 * in roots. */
const Theme = ({ state }) => {
  // Get information about the current URL.
  const data = state.source.get(state.router.link);

  return (
    <>
      // ...

      {/* Add some global styles for the whole site */}
       <Global styles={globalStyles} />
      {/* Add the header of the site. */}
      <HeadContainer>
        <Header />
      </HeadContainer>
      {/* Add the main section */}
      <Main>
        <Switch>
          <Loading when={data.isFetching} />
          <List when={data.isArchive} />
          <Page when={data.isPage} /> {/* Added Page component */}
          <Post when={data.isPostType} />
          <PageError when={data.isError} />
        </Switch>
      </Main>
    </>
  );
};

export default connect(Theme);

// styled components
Now we’re importing the <Page / component and have added our <Main /> styled component.
Let’s move on to our custom footer component. You probably know what to do by now: create a new footer.js component file and drop it into the /src/components/footer/ folder. We can add some widgets to our footer that display the sitemap and some sort of “Powered by” blurb:
This is a super simple example. Please note that I have imported a <Widget /> component (line 4, highlighted above) and called the component (line 9, highlighted above). We don’t actually have a <Widget /> component yet, so let’s make that while we’re at it. That can be a widget.js file in the same directory as the footer, /src/components/footer/.
The default header.js component in Mars Theme is very basic with a site title and site description and navigation items underneath. I wanted to refactor the header component with a site logo and title on the left and the nav.js component (top navigation) on the right.
// src/components/header.js
import { connect, styled } from "frontity";
import Link from "./link";
import Nav from "./nav";
import MobileMenu from "./menu";
import logo from "./images/frontity.png"

const Header = ({ state }) => {
  return (
    <>
      <Container>
        <StyledLink link="/">
         {/* Add header logo*/}
          <Logo src={logo} />
          <Title>{state.frontity.title}</Title>
        </StyledLink>
          {/*<Description>{state.frontity.description}</Description> */}
          <Nav />
      </Container>
        <MobileMenu />
    </>
  );
};
// Connect the Header component to get access to the `state` in its `props`
export default connect(Header);

const Container = styled.div`
  width: 1000px;
  // ...
  `}
{/* Logo styled component */}
const Logo = styled.img`
  max-width: 30px;
  display: inline-block;
  border-radius: 15px;
  margin-right: 15px;
`;

// ...
My refactored header.js component imports a logo image (line 6, highlighted above) and uses in line 14. The nav.js component shown below is basically the same, only with some minor styling modifications.
Adding the <Global> style component
We have already covered the <Global> component and how it’s used for site-wide CSS. There are only a few global styles in the default Mars Theme root component, and I wanted to add more.
I did that with a separate globalStyles file at /src/components/styles/globalStyles.js — similar to Frontity’s Twenty Twenty theme — and added root variables, a CSS reset, and common site-wide element styles, found in the GitHub repo.
Implementing fluid typography
Even though it’s not really in scope, I really wanted to use fluid typography in my custom theme as part of my overall learning journey. So, I added it to the global styles.
It was a fun working with the clamp() function because it meant I could set a range of sizes without any media queries at all!
Adding webfonts to the theme
I also wanted to use a different webfont in my theme. Importing webfonts in CSS using @font-face is covered here on CSS-Tricks. Frontity’s Twenty Twenty Theme uses it, so that’s a good place to reference as well.
We can use the fonts with either with a <link>in the HTML head or with @import in CSS. But Chris covered how to use @font-face with Google Fonts, which allows us to optimize the number of HTTP requests we make since we can download the fonts to our own server.
Those fonts point to a /fonts folder that doesn’t exist. So, let’s make one there and make sure all of the correct font files are in it so the fonts load properly.
Importing globalStyles and @face-font components to the root <Theme /> component
Let’s open our theme root component, /src/components.index.js, and add our globalStyles.js and font-face.js components in there. As shown below, we should import both components into index.js and call the components later.
// src/components/index.js

// ...
import FontFace from "./styles/font-face";
import globalStyles from "./styles/globalStyles";

/** Theme is the root React component of our theme. The one we will export
 * in roots. */
const Theme = ({ state }) => {
  // Get information about the current URL.
  const data = state.source.get(state.router.link);

  return (
    <>
    // ...

    {/* Add some global styles for the whole site, like body or a's.
     *  Not classes here because we use CSS-in-JS. Only global HTML tags. */}
      <Global styles={globalStyles} />
      <FontFace />
      {/* Add the header of the site. */}
      // ...

export default connect(Theme);

 {/* delete original globalStyles css component */}

 // ...
Finally, we should remove mars-theme globalStyles component from index.js. Now our new fonts are applied throughout our project.
Styling pages and posts
Our posts and pages are pretty much styled already, except for some Gutenberg block contents, like buttons, quotes, etc.
To style our post entry meta data, let’s add icons for the author, date, categories, and tags. Frontity’s port of the WordPress Twenty Nineteen theme uses SVG icons and components for author.js, categories.js, posted-on.js and tags.js components, which we can totally copy and use in our own project. I literally copied the top-level entry-meta folder and everything in it from the frontity-twentynineteen theme and added it all to the /components/posts/ project folder.
Next we should update our src/components/list/list-item.js component so we can use the new assets:
// src/components/list/list-item.js

import { connect, styled } from "frontity";
import Link from "../link";
import FeaturedMedia from "../featured-media";

// import entry-meta
import Author from "../entry-meta/author";
import PostedOn from "../entry-meta/posted-on";

const Item = ({ state, item }) => {

  return (
    <article>
      <div>
        {/* If the post has an author, we render a clickable author text. */}
        <EntryMeta>
          <Author authorId={item.author} /> {"|  "}
          <PostedOn post={item} />
        </EntryMeta>
      </div>

      <Link link={item.link}>
        <Title dangerouslySetInnerHTML={{ __html: item.title.rendered }} />
      </Link>
      // ...
    </article>
  );
};

// Connect the Item to gain access to `state` as a prop
export default connect(Item);
With these styles in place, our archive page entry meta looks good with icons displayed before entry-meta taxonomy (authors, posted-on).
Here we will modify archives taxonomy page styling with more descriptive header. Let’s update list.js component of our /src/components/list/list.js as shown below.
// src/components/list/list.js

import React from "react";
import { connect, styled, decode } from "frontity";
import Item from "./list-item";
import Pagination from "./pagination";

const List = ({ state }) => {
  // Get the data of the current list.
  const data = state.source.get(state.router.link);

  return (
    <Container className="entry-content">
      {/* If the list is a taxonomy, we render a title. */}
      {data.isAuthor ? (
        <Header>
          Author Archives:{" "}
          <PageDescription>
          {decode(state.source.author[data.id].name)}
          </PageDescription>
        </Header>
        ) : null}

        {/* If the list is a taxonomy or category, we render a title. */}
        {data.isTaxonomy || data.isCategory ? (
          <Header>
            {data.taxonomy.charAt(0).toUpperCase() + data.taxonomy.slice(1)}{" "}
            Archives:{" "}
            <PageDescription>
            {decode(state.source[data.taxonomy][data.id].name)}
            </PageDescription>
          </Header>
        ) : null}
      // ...

      <Pagination />
    </Container>
  );
};
export default connect(List);

const PageDescription = styled.span`
  font-weight: bold;
  font-family: var(--body-family);
    color: var(--color-text);
`;
// ...
In the example above, we wrapped taxonomy.id data with PageDesctiption styled component applied some styling rules.
The post pagination in the default Mars Theme is very basic with almost no styling. Let’s borrow from the Frontity Twenty Nineteen theme again and add the pagination component and styling from the theme by copying the pagination.js component file in its entirety, and paste it to /src/components/list/pagination.js in our theme.
I added some minor CSS and it works perfectly in our project.
To customize the actual individual posts and pages, let’s make bold header title that’s centered and displays the entry meta:
// src/components/posts/post.js

// ...
// Import entry-meta
import Author from "../entry-meta/author";
import PostedOn from "../entry-meta/posted-on";
import Categories from "../entry-meta/categories";
import Tags from "../entry-meta/tags";

const Post = ({ state, actions, libraries }) => {
  // ...
  // Load the post, but only if the data is ready.
  return data.isReady ? (
    <Container className="main">
      <div>
        <Title dangerouslySetInnerHTML={{ __html: post.title.rendered }} />

        {/* Hide author and date on pages */}
        {data.isPost && (
          <EntryMeta>
          <Author authorId={post.author} />
          <PostedOn post={post} />
        </EntryMeta>
        )}
      </div>

      {/* Look at the settings to see if we should include the featured image */}
      {state.theme.featured.showOnPost && (
        <FeaturedMedia id={post.featured_media} />
      )}

      {data.isAttachment ? (
        <div dangerouslySetInnerHTML={{ __html: post.description.rendered }} />
      ) : (
        <Content>
          <Html2React html={post.content.rendered} />
          {/* Add footer meta-entry */}
          <EntryFooter>
            <Categories cats={post.categories} />
            <Tags tags={post.tags} />
          </EntryFooter>
        </Content>
      )}
    </Container>
  ) : null;
};

export default connect(Post);
// ...
Adding Gutenberg block styles
WordPress uses a separate stylesheet for blocks in the Block Editor. Right now, that stylesheet isn’t being used but it would be great if we could get some base styles in there that we use for the various block content we add to pages and posts.
That .wp-block-buttons class is declared in the WordPress blocks stylesheet that we aren’t using… yet.
The WordPress Block Editor uses two styling files: style.css and theme.css. Let’s copy these directly from Frontity’s port of the Twenty Twenty theme because that’s how they implemented the WordPress styles. We can place those inside a /styles/gutenberg/ folder.
“Gutenberg” is the codename that was given to the WordPress Block Editor when it was in development. It’s sometimes still referred to that way.
Let’s add the above two style files to our theme root component, /src/components/index.js, just like we did earlier for globalStyles:
//  src/components/index.js
import gutenbergStyle from "./styles/gutenberg/style.css";
import gutenbergTheme from "./styles/gutenberg/theme.css"
Here’s our updated <Theme /> root component:
// src/components/index.js

// ...
import FontFace from "./styles/font-face";
import globalStyles from "./styles/globalStyles";
// Add Gutenberg styles
import gutenbergStyle from "./styles/gutenberg/style.css";
import gutenbergTheme from "./styles/gutenberg/theme.css"

/** Theme is the root React component of our theme. The one we will export
  * in roots. */
const Theme = ({ state }) => {
  // Get information about the current URL.
  const data = state.source.get(state.router.link);

  return (
    <>
    // ...
    {/* Add some global styles for the whole site, like body or a's.
      * Not classes here because we use CSS-in-JS. Only global HTML tags. */}
      <Global styles={globalStyles} />
      <Global styles={css(gutenbergStyle)} />
      <Global styles={css(gutenbergTheme)} />
      <FontFace />
      {/* Add the header of the site. */}
      // ...
export default connect(Theme);

 {/* Delete original globalStyles css component */}
 // ...
We could go about overriding styles many different ways. I went with a simple route. For example, to overriding button styles — .wp-block-buttons — in the styled-component for pages and posts.
We can write override any other block styles the same way. In Frontity’s Twenty Nineteen theme, the entire stylesheet from the WordPress version of the theme is added tothe Frontity version to replicate the exact same appearance. Frontity’s Twenty Twenty port uses only a select few of the styles in the WordPress Twenty Twenty themes, but as inline styles.
Additional styling resources
All the resources we covered in this section on styling are available in the GitHub repository. If you wish to expand my @frontity/labre-theme project further, here are the resources that I gathered.
Comments: The native WordPress functionality for comments are described in this guide.
Infinity Scroll Hooks: This Frontity demo project demonstrates how to use the Infinite Scroll Hooks available in the @frontity/hooks package. Here is a YouTube video that covers it.
Yoast SEO: This is a super popular WordPress plugin and I’m sure many of you would want to use it in Frontity as well. Follow this @frontity/package documentation which automatically gets and renders all of the tags exposed in the REST API by the plugin.
Section 6: Resources and credit
There are ample resources to learn and customize your Frontity project. While preparing this post, I have referred to the following resources extensively. Please refer to original posts for more detailed information.
Frontity documentation and articles
Step-by-step tutorial (Frontity): This is the perfect place to start if you’re new to Frontity, or even if you’ve previously used Frontity and want to level up.
Conceptial guides (Frontity): These guides helps solve some of the common challenges that come up when working with dynamic server-side rendering in React apps connected to WordPress.
Frontity API reference (Frontity). This contains detailed information about Frontity CLI, packages, plugins and themes. Once you’ve mastered the basics of working with Frontity, this is where you’re likely to spend most of your time when working on projects.”
Frontity example repo (Frontity): This is a collection of Frontity projects that demonstrate how Frontity is used in the wild.
Connecting Gutenberg and Frontity (Mario Santos, Frontity product manager) This post is based on Mario’s talk at the 2020 JavaScript for WordPress Conference and has an accompanying video.
Frontity case studies
Moving to Frontity: Diariomotor Case Study (Reyes Martinez): Learn how Frontity helped drive the evolution of Diariomotor, reducing development time and putting them on the path to better performance.
Migrating Aleteia to Frontity (Reyes Martinez). Aleteia is the leading website for Catholic news. Frontity allowed them to move to a modern front-end stack in just a couple of months.
Introducing AWSM F1 Theme for Frontity (Venuraj Varma). Awsm Innovations rebuilt their website with Frontity to boost web performance and deliver a great user experience.
How to Fetch the WordPress Menus in Frontity (Michael Burridge). In this video, Michael explains how to dynamically fetch WordPress menu-items using the WordPress WP-REST-API V2 Menus plugin.
Connecting Gutenberg and Frontity: A Case Study (Mario Santos). In this talk video, Frontity product manager Mario explains how the official Frontity website was rebuilt with both the WordPress Block Editor and Frontity, while highlighting all the challenges and lessons learned along the way.
Frontity has a vibrant and engaging community forum for asking questions or getting help regarding your Frontity project.
Wrapping up and personal thoughts
If you can’t already tell from this post or the others I’ve written, I have a huge passion for headless WordPress sites. As I wrote in a previous article, I came across Frontity through when Chris posted this article. I have been experimenting with it for over six months, choosing to take a deep drive into Frontity and the building blocks used in its default Mars Theme. I must admit that it’s a fascinating software framework and I’ve had an enjoyable learning experience. I may even use this sort of setup for my own personal site!
Here are a few key takeaways from my experience working with Frontity so far:
It’s beginner-friendly and low maintenance: One of the things that impressed me most with Frontity is how relatively easy it is to jump into, even as a beginner. It installs with a couple of commands and takes care of all the setup and configuration for connecting to WordPress via the REST API—something I would have struggled with if left to my own devices.
It works with experimental block themes. In my very limited testing, Frontity’s framework works as expected with experimental block themes, just as it does with classic WordPress themes, like Twenty Twenty. I tested with the Quadrat theme that supports the experimental stuff the Gutenberg team is working on.
Hosting is good, but maybe too expensive: As Chris wrote, Frontity is “a perfect match for Vercel.” However, the current Jamstack pricing model that includes Vercel is unattractive for many ordinary WordPress users.
Frontity’s documentation is good, but could be better: The Frontity team recently reorganized Frontity documentation into tutorials, guides and an API reference. However, in my opinion it’s still confusing for those just getting into the framework.
Because I enjoyed this project so much, I am currently doing a theme project from scratch. Even in WordPress, I learned best by getting my hands dirty building WordPress themes from scratch.
While I am still doing my Gatsby and Frontity side projects, I have not lost my sight from the ongoing WordPress block editor and block-based theme development. At the time of writing, there are already sixteen block-based themes in the WordPress theme directory. I have just started exploring and understanding experimental block themes, which might be another interesting learning project.
After this project, my thoughts about Gatsby, Frontity and the concept of headless sites are still evolving. That’s only because it’s tough to make a fair comparison of when a lot of the tooling is actively in development and changing all the time. There are even experimental themes, that are much lighter and different structural markups than the current PHP-based classic themes, which might be a subject for yet another time.
Please share your experience and thoughts if you have been using Frontity in your projects. As always, I enjoy reading any comments and feedback!
I did a sponsored video the other week explaining how to build a paid subscription newsletter using WordPress (we did it on WordPress.com but it could be hosted anywhere), MailPoet (a plugin to visually author the emails, as well as send them), and WooCommerce (to manage the payments and subscriptions).
I spent a lot of time on it! I feel personally compelled by the idea because I’m pretty big on having a website you control be the home base for your business. If a paid newsletter is part of your business, awesome, might as well use your own website to do it.
If you’d like to be more slowly guided through the process, watch that video above. I literally do the entire thing from start to finish in that video. But I know some folks like a more rapid-fire explanation, so allow me to do that quick.
1. Have a WordPress site
Self-hosted works. You can also use WordPress.com so long as you’re on the Business or eCommerce plan, because you’ll need to install plugins.
2. Install WooCommerce & WooCommerce Subscriptions on it.
MailPoet is a plugin. On WordPress.com, you might even be prompted to install it while installing the WooCommerce plugins. But if not, you can install it anytime.
4) Create a product that is a subscription
This is straightforward stuff in WooCommerce. Add a product and set the type to “Simple subscription.”
5. Craft an awesome newsletter in MailPoet
This is what MailPoet excels at. It’s a visual email builder right in your WordPress admin. It has excellent templates to start you started.
6. Send the newsletter only to people with an active subscription.
The trick is to make a “segment” of a list that is specifically created from WooCommerce customers that have an active subscription.
That’s it, really. You should know that MailPoet is an email sending service as well, and you’ll probably want to use that, since it’s free up to 1,000 subscribers anyway, is very easy to hook up, and will provide you with analytics data on the sends. But you can also wire it up to other email sending services as well.
Again, the beauty of all this is that it all happens from your website — meaning you could also be sending out a non-subscription newsletter with the same system. You could publish the newsletters on your website as an SEO play. You could sell other products and services since you have 100% of the infrastructure to do that now. You’re really in good hands here with a lot of power and flexibility.
Frontity’s official website itself is a very interesting production-level use case that demonstrates how to successfully link the WordPress Block Editor to Frontity’s framework.
So what I’m going to do is walk you through the steps to create a Frontity site in this article, then follow it up with another article on using and customizing Frontity’s default Mars theme. We’ll start with this post, where we’ll cover the basics of setting up a headless WordPress site on the Frontity framework.
This is not an expert guide but rather a headless WordPress site enthusiast’s journey toward learning the Frontity experience. For a more detailed and authoritative guide, please refer to Frontity’s documentation. frontity doc.
Prerequisites and requirements
Because Frontity is a React-based framework, I’d recommend that you have a working knowledge of React, and JavaScript with ES6 features. Frontity’s tutorial doc details some additional requirements, including:
In the decoupled mode (see below) Frontity fetches REST API data from a WordPress PHP server and returns the final HTML to users as an isomorphic React App (used in the custom theme). In this mode, main domain points to Frontity whereas sub-domain pointing to WordPress site.
In the embedded mode, the Frontity theme package (an Isomorphic React App) replaces the WordPress PHP theme via a required Frontity Embedded Mode plugin. The plugin makes an internal HTTP request to the Frontity/Node.js server to retrieve the HTML pages. In this mode, the main domain points to WordPress where both the site visitors and content editors use the same domain, while Frontity uses the secondary domain (i.e. sub-domain).
Frontity’s built-in AMP feature generates a stripped down version of HTML pages for faster server-side-rendering thus overcoming multiple WordPress requests. It provides a more dynamic static site experience that is fast and has built-in server extedability that could be further improved using a Serverless Pre-redendering (SPR) (also called stale-while-revalidate cache) technique through KeyCDN and StackPath.
To start our project, we need to install a Frontity project site and a WordPress installation for the data source endpoint. In the following sections, we will learn how to set up our Frontity site and connect it to our WordPress installation. The Frontity quick start guide is a very handy step-by-step guide and following guide allows us to set up our Frontity project.
First, check if Node.js and npm is already installed in your machine. If not, download and install them.
#! check node -- version
node --version
V14.9.0 #! output if installed
#! check npm version
npm --version
6.14.7  #! output if installed
#! to upgrade npm to latest version
npm install npm@latest -g
Step 1: Creating a Frontity project
Let’s run the following command using the Frontity CLI to create a new my-frontity project.
### creating a frontity project
npx frontity create my-frontity
The above code produces the following output.
Step 2: Select the Frontity mars-theme
Frontity provides two themes, twentytwenty-theme and mars-theme. For starters, Frontity recommends selecting the mars-theme and provides the following output:
If you answer the prompt for e-mail, a valid email address should be entered. I found it useful to enter the email for the first time so I can stay in contact with Frontity developers, but thereafter I didn’t see any use.
Step 3: Frontity project installation
The Frontity server installs the project and its dependencies. If successfully installed, the following output should be displayed:
Step 4: Change directory and restart development server
To get into the project folder, change directory with the following command and start the server to view the newly-created project:
### change dir to project folder
cd my-frontity
The Frontity development server can be started with the following command:
### start development server with npx
npx frontity dev

### starting dev server with yarn
yarn frontity dev
When the development server successfully completes, the project can be viewed at http://localhost:3000 and should display the following screen in the browser:
The above screenshot shows a completed Frontity powered WordPress site front-end with mars-theme. The site is not connected to our own site yet which we will discuss in the next section.
Section 2: WordPress site installation
We need a WordPress site for our data source. We can either use an already installed site or install a fresh test site on your local machine. For this project, I install the latest version of WordPress in my machine with Local and imported theme test data which includes test data for block editor styling as well.
In recent versions of WordPress, the WordPress REST API is built right into WordPress core, so we can check whether it is publicly extending our wp-content data by appending /wp-json to our site URL (e.g. http//mytestsite.local/wp-json). This should return the content in JSON format. Then we are good to proceed.
Select pretty permalinks
One other condition Frontity requires in our WordPress installation is that the pretty permalinks (post name) needs to be activated in Settings > Permalinks.
Section 3: Connecting the Frontity project to WordPress
To connect our WordPress site to frontity project, we should update the frontity.settings.js file:
// change source URL in frontity.settings.js
const settings = {
  ...,
  packages: [
    ...,
    {
      name: "@frontity/wp-source",
      state: {
        source: {
          // Change this url to point to your WordPress site.
          api: "http://frontitytest.local/wp-json"
        }
      }
    }
  ]
}
Please take note that while updating the URL to our WordPress install, we need to change the state.source object name from url to api (highlighted above) and save the file with our updates. Restart the development server, and we will see that the Frontity site is now connected to our own WordPress site.
In the screenshot above, you will notice that the menu items (Nature, Travel, Japan, About Us) are still displayed from the Frontity demo site, which we will fix in the next step.
Step 1: Updating our menu in Frontity site
WordPress treats menus items as private custom post types and are visible only to those who are logged into WordPress. Until the WordPress REST-API Version 2 is released, menu items are not exposed as visible endpoints, but registered menus can be extended using WP-REST-API V2 Menu plugin.
Because menu items are changed infrequently, Frontity Mars theme menu items are often hard-coded in the frontity.settings.js file to be store as state and then exported to the index.js file. For this demo project, I created the WordPress site menu as described in the frontity Mars theme with category and tags.
Next, let’s add our menu items to frontity-settings.js file as described in the Frontity Mars theme.
Let’s save our updates and restart development server as before. We should be able to see menu items (Block, Classic, Alignment, About) from our own site in the header section.
Lines 13-16 define whether we would like to show the featured image on the list (e.g. index page) or on post (e.g. single page).
Step 2: Frontity project folder structure
Our frontity-demo project (we changed project folder name from my-frontity) should contain two files, package.json and frontity.settings.js, and both node_modules/ and packages/mars-theme folders.
A brief descriptions of the files/folders as described in the Frontity doc:
node_modules: where the Frontity project dependencies are installed (aren’t meant to be modified).
packages/ : a folder with mars-theme installed. The theme folder contains src folder which contains custom packages, and maybe some core packages from Frontity that can be edited and customized as desired. Everything in Frontity is a package.
frontity.setiings.js: This is most import file where the basic setup for our app is already populated. Currently these set up are Frontity default but any desired settings and extension are configured in this file. For example, data source URL (e.g. WordPress site URL), and required packages and libraries to run the project are defined under Frontity state package.
package.json: file where the dependencies needed for your app to work are declared.
We’ll get into Frontity theme packages and other dependencies, but in a later article since they warrant a deeper explanation.
Step 3: Modifying styles
Frontity uses the popular CSS-in-JS library Emotion for styling its component. Frontity’s default mars-theme is styled with styled components available from @emotion/syled. Styled components is very similar to CSS. Later in other sections, we will deep-dive into styling frontity project and with a use case example of modifying the entire mars-theme’s styling.
For now let’s do a quick demonstration of changing the color of our site title and description. The header and description styles are defined as Title and Description styled components at the bottom of the header.js component. Now let’s change title color to yellow and the description color to some sort of aqua (left panel). We see the changes reflected in our site header.
Section 4: Deploying the site to Vercel
Frontity lists three popular hosting service providers for hosting a Frontity project, including Vercel, Moovweb XDN, and Heroku. However, in practice it appears that most Frontity projects are hosted at Vercel, as Chris writes, “it’s a perfect match for Vercel.“ Frontity highly recommends Vercel and has prepared a handy step-by-step deployment guide.
Step 1: Create a production version of frontity project
While developing our Frontity project, we develop with the npx frontity dev command. For deployment, we should create a production version of the project from the root of our Frontity project.
#! create production version of project
npx frontity build
This createsa build folder “containing both our Frontity project (isomorphic) React app and Frontity (Node.js) server and the content will be used by the command npm frontity serve.”
Step 2: Create an account at Vercel
First, we should create a Vercel account following this signup form, which we can do using our GitHub credentials. We should login from our Frontity projects root folder in the terminal:
#! login to vercel
npx vercel login
Step 3: Create vercel.json file
To deploy our site to Vercel, we need the following vercel.json file at the root of our project:
Finally, let’s deploy our project using the vercelcommand from the root of our project folder:
#! deployment vercel
npx vercel
Next, we are asked brief deployment-related questions:
Wrapping up
If you have been reading my other articles on WordPress headless sites using Gatsby’s framework, I have had an admirable but frustrating experience, primarily because of my own technical skills to learn and maintain advanced frameworks as a one-man team. Then I came across the Frontity React Framework while reading an article on CSS-Tricks.
As we learned from this and Chris’ article, creating a headless WordPress site with Frontity is pretty simple, all things considered. I am very impressed with its easy setup, streamlined UI, plus it appears to be a better option for less tech-savvy users. For example, you get all of the WordPress content without writing a single query.
In a follow-up article, we will do a deep dive on the default Frontity Mars theme and learn how to customize it to make it our own.
And maybe an optional follow-up if you’re up for it.
Automattic, the makers of Jetpack and many other WordPress-y things, have sponsored my site (me = Chris Coyier; site = CSS-Tricks) for quite a while. I use Jetpack myself, and I’m always trying to tell people about its features and benefits.
Yet I get the sense that there is a decent amount of hesitancy (or even general negative feelings) toward Jetpack. I want to hone in on that and understand it better. This will be useful for me in my attempt to be a good sponsoree, and useful for Automattic to improve Jetpack.
Now that we’ve seen that web components and interactive web components are both easier than you think, let’s take a look at adding them to a content management system, namely WordPress.
There are three major ways we can add them. First, through manual input into the site—putting them directly into widgets or text blocks, basically anywhere we can place other HTML. Second, we can add them as the output of a theme in a theme file. And, finally, we can add them as the output of a custom block.
Loading the web component files
Now whichever way we end up adding web components, there’s a few things we have to ensure:
our custom element’s template is available when we need it,
any JavaScript we need is properly enqueued, and
any un-encapsulated styles we need are enqueued.
We’ll be adding the <zombie-profile> web component from my previous article on interactive web components. Check out the code over at CodePen.
Let’s hit that first point. Once we have the template it’s easy enough to add that to the WordPress theme’s footer.php file, but rather than adding it directly in the theme, it’d be better to hook into wp_footer so that the component is loaded independent of the footer.php file and independent of the overall theme— assuming that the theme uses wp_footer, which most do. If the template doesn’t appear in your theme when you try it, double check that wp_footer is called in your theme’s footer.php template file.
<?php function diy_ezwebcomp_footer() { ?>
  <!-- print/echo Zombie profile template code. -->
  <!-- It's available at https://codepen.io/undeadinstitute/pen/KKNLGRg -->
<?php }
add_action( 'wp_footer', 'diy_ezwebcomp_footer');
Next is to enqueue our component’s JavaScript. We can add the JavaScript via wp_footer as well, but enqueueing is the recommended way to link JavaScript to WordPress. So let’s put our JavaScript in a file called ezwebcomp.js (that name is totally arbitrary), stick that file in the theme’s JavaScript directory (if there is one), and enqueue it (in the functions.php file).
We’ll want to make sure that last parameter is set to true , i.e. it loads the JavaScript before the closing body tag. If we load it in the head instead, it won’t find our HTML template and will get super cranky (throw a bunch of errors.)
If you can fully encapsulate your web component, then you can skip this next step. But if you (like me) are unable to do it, you’ll need to enqueue those un-encapsulated styles so that they’re available wherever the web component is used. (Similar to JavaScript, we could add this directly to the footer, but enqueuing the styles is the recommended way to do it). So we’ll enqueue our CSS file:
That wasn’t too tough, right? And if you don’t plan to have any users other than Administrators use it, you should be all set for adding these wherever you want them. But that’s not always the case, so we’ll keep moving ahead!
Don’t filter out your web component
WordPress has a few different ways to both help users create valid HTML and prevent your Uncle Eddie from pasting that “hilarious” picture he got from Shady Al directly into the editor (complete with scripts to pwn every one of your visitors).
So when adding web-components directly into blocks or widgets, we’ll need to be careful about WordPress’s built-in code filtering . Disabling it all together would let Uncle Eddie (and, by extension, Shady Al) run wild, but we can modify it to let our awesome web component through the gate that (thankfully) keeps Uncle Eddie out.
First, we can use the wp_kses_allowed filter to add our web component to the list of elements not to filter out. It’s sort of like we’re whitelisting the component, and we do that by adding it to the the allowed tags array that’s passed to the filter function.
We’re adding an empty array to the <zombie-profile> component because WordPress filters out attributes in addition to elements—which brings us to another problem: the slot attribute (as well as part and any other web-component-ish attribute you might use) are not allowed by default. So, we have to explitcly allow them on every element on which you anticipate using them, and, by extension, any element your user might decide to add them to. (Wait, those element lists aren’t the same even though you went over it six times with each user… who knew?) Thus, below I have set slot to true on <span>, <img> and <ul>, the three elements I’m putting into slots in the <zombie-profile> component. (I also set part to true on span elements so that I could let that attribute through too.)
Sadly, there is one more possible wrinkle with this. You may not run into this if all the elements you’re putting in your slots are inline/phrase elements, but if you have a block level element to put into your web component, you’ll probably get into a fistfight with the block parser in the Code Editor. You may be a better fist fighter than I am, but I always lost.
The code editor is an option that allows you to inspect and edit the markup for a block.
For reasons I can’t fully explain, the client-side parser assumes that the web component should only have inline elements within it, and if you put a <ul> or <div>, <h1> or some other block-level element in there, it’ll move the closing web component tag to just after the last inline/phrase element. Worse yet, according to a note in the WordPress Developer Handbook, it’s currently “not possible to replace the client-side parser.”
While this is frustrating and something you’ll have to train your web editors on, there is a workaround. If we put the web component in a Custom HTML block directly in the Block Editor, the client-side parser won’t leave us weeping on the sidewalk, rocking back and forth, and questioning our ability to code… Not that that’s ever happened to anyone… particularly not people who write articles…
Component up the theme
Outputting our fancy web component in our theme file is straightforward as long as it isn’t updated outside the HTML block. We add it the way we would add it in any other context, and, assuming we have the template, scripts and styles in place, things will just work.
But let’s say we want to output the contents of a WordPress post or custom post type in a web component. You know, write a post and that post is the content for the component. This allows us to use the WordPress editor to pump out an archive of <zombie-profile> elements. This is great because the WordPress editor already has most of the UI we need to enter the content for one of the <zombie-profile> components:
The post title can be the zombie’s name.
A regular paragraph block in the post content can be used for the zombie’s statement.
The featured image can be used for the zombie’s profile picture.
That’s most of it! But we’ll still need fields for the zombie’s age, infection date, and interests. We’ll create these with WordPress’s built in Custom Fields feature.
We’ll use the template part that handles printing each post, e.g. content.php, to output the web component. First, we’ll print out the opening <zombie-profile> tag followed by the post thumbnail (if it exists).
<zombie-profile>
  <?php
    // If the post featured image exists...
    if (has_post_thumbnail()) {
      $src = wp_get_attachment_image_url(get_post_thumbnail_id()); ?>
      <img src="<?php echo $src; ?>" slot="profile-image">
    <?php
    }
  ?>
Next we’ll print the title for the name
<?php
  // If the post title field exits...
  if (get_the_title()) { ?>
  <span slot="zombie-name"><?php echo get_the_title(); ?></span>
  <?php
  }
?>
In my code, I have tested whether these fields exist before printing them for two reasons:
It’s just good programming practice (in most cases) to hide the labels and elements around empty fields.
If we end up outputting an empty <span> for the name (e.g. <span slot="zombie-name"></span>), then the field will show as empty in the final profile rather than use our web component’s built-in default text, image, etc. (If you want, for instance, the text fields to be empty if they have no content, you can either put in a space in the custom field or skip the if statement in the code).
Next, we will grab the custom fields and place them into the slots they belong to. Again, this goes into the theme template that outputs the post content.
One of the downsides of using the WordPress custom fields is that you can’t do any special formatting, A non-technical web editor who’s filling this out would need to write out the HTML for the list items (<li>) for each and every interest in the list. (You can probably get around this interface limitation by using a more robust custom field plugin, like Advanced Custom Fields, Pods, or similar.)
Lastly. we add the zombie’s statement and the closing <zombie-profile> tag.
Because we’re using the body of the post for our statement, we’ll get a little extra code in the bargain, like paragraph tags around the content. Putting the profile statement in a custom field will mitigate this, but depending on your purposes, it may also be intended/desired behavior.
You can then add as many posts/zombie profiles as you need simply by publishing each one as a post!
Block party: web components in a custom block
Creating a custom block is a great way to add a web component. Your users will be able to fill out the required fields and get that web component magic without needing any code or technical knowledge. Plus, blocks are completely independent of themes, so really, we could use this block on one site and then install it on other WordPress sites—sort of like how we’d expect a web component to work!
There are the two main parts of a custom block: PHP and JavaScript. We’ll also add a little CSS to improve the editing experience.
First, the PHP:
function ez_webcomp_register_block() {
  // Enqueues the JavaScript needed to build the custom block
  wp_register_script(
    'ez-webcomp',
    plugins_url('block.js', __FILE__),
    array('wp-blocks', 'wp-element', 'wp-editor'),
    filemtime(plugin_dir_path(__FILE__) . 'block.js')
  );

  // Enqueues the component's CSS file
  wp_register_style(
    'ez-webcomp',
    plugins_url('ezwebcomp-style.css', __FILE__),
    array(),
    filemtime(plugin_dir_path(__FILE__) . 'ezwebcomp-style.css')
  );

  // Registers the custom block within the ez-webcomp namespace
  register_block_type('ez-webcomp/zombie-profile', array(
    // We already have the external styles; these are only for when we are in the WordPress editor
    'editor_style' => 'ez-webcomp',
    'editor_script' => 'ez-webcomp',
  ));
}
add_action('init', 'ez_webcomp_register_block');
The CSS isn’t necessary, it does help prevent the zombie’s profile image from overlapping the content in the WordPress editor.
/* Sets the width and height of the image.
 * Your mileage will likely vary, so adjust as needed.
 * "pic" is a class we'll add to the editor in block.js
*/
#editor .pic img {
  width: 300px;
  height: 300px;
}
/* This CSS ensures that the correct space is allocated for the image,
 * while also preventing the button from resizing before an image is selected.
*/
#editor .pic button.components-button {
  overflow: visible;
  height: auto;
}
The JavaScript we need is a bit more involved. I’ve endeavored to simplify it as much as possible and make it as accessible as possible to everyone, so I’ve written it in ES5 to remove the need to compile anything.
Show code
(function (blocks, editor, element, components) {
  // The function that creates elements
  var el = element.createElement;
  // Handles text input for block fields
  var RichText = editor.RichText;
  // Handles uploading images/media
  var MediaUpload = editor.MediaUpload;

  // Harkens back to register_block_type in the PHP
  blocks.registerBlockType('ez-webcomp/zombie-profile', {
    title: 'Zombie Profile', //User friendly name shown in the block selector
    icon: 'id-alt', //the icon to usein the block selector
    category: 'layout',
    // The attributes are all the different fields we'll use.
    // We're defining what they are and how the block editor grabs data from them.
    attributes: {
      name: {
        // The content type
        type: 'string',
        // Where the info is available to grab
        source: 'text',
        // Selectors are how the block editor selects and grabs the content.
        // These should be unique within an instance of a block.
        // If you only have one img or one <ul> etc, you can use element selectors.
        selector: '.zname',
      },
      mediaID: {
        type: 'number',
      },
      mediaURL: {
        type: 'string',
        source: 'attribute',
        selector: 'img',
        attribute: 'src',
      },
      age: {
        type: 'string',
        source: 'text',
        selector: '.age',
      },
      infectdate: {
        type: 'date',
        source: 'text',
        selector: '.infection-date'
      },
      interests: {
        type: 'array',
        source: 'children',
        selector: 'ul',
      },
      statement: {
        type: 'array',
        source: 'children',
        selector: '.statement',
      },
  },
  // The edit function handles how things are displayed in the block editor.
  edit: function (props) {
    var attributes = props.attributes;
    var onSelectImage = function (media) {
      return props.setAttributes({
        mediaURL: media.url,
        mediaID: media.id,
      });
    };
    // The return statement is what will be shown in the editor.
    // el() creates an element and sets the different attributes of it.
    return el(
      // Using a div here instead of the zombie-profile web component for simplicity.
      'div', {
        className: props.className
      },
      // The zombie's name
      el(RichText, {
        tagName: 'h2',
        inline: true,
        className: 'zname',
        placeholder: 'Zombie Name…',
        value: attributes.name,
        onChange: function (value) {
          props.setAttributes({
            name: value
          });
        },
      }),
      el(
        // Zombie profile picture
        'div', {
          className: 'pic'
        },
        el(MediaUpload, {
          onSelect: onSelectImage,
          allowedTypes: 'image',
          value: attributes.mediaID,
          render: function (obj) {
            return el(
              components.Button, {
                className: attributes.mediaID ?
                  'image-button' : 'button button-large',
                onClick: obj.open,
              },
              !attributes.mediaID ?
              'Upload Image' :
              el('img', {
                src: attributes.mediaURL
              })
            );
          },
        })
      ),
      // We'll include a heading for the zombie's age in the block editor
      el('h3', {}, 'Age'),
      // The age field
      el(RichText, {
        tagName: 'div',
        className: 'age',
        placeholder: 'Zombie's Age…',
        value: attributes.age,
        onChange: function (value) {
          props.setAttributes({
            age: value
          });
        },
      }),
      // Infection date heading
      el('h3', {}, 'Infection Date'),
      // Infection date field
      el(RichText, {
        tagName: 'div',
        className: 'infection-date',
        placeholder: 'Zombie's Infection Date…',
        value: attributes.infectdate,
        onChange: function (value) {
          props.setAttributes({
            infectdate: value
          });
        },
      }),
      // Interests heading
      el('h3', {}, 'Interests'),
      // Interests field
      el(RichText, {
        tagName: 'ul',
        // Creates a new <li> every time `Enter` is pressed
        multiline: 'li',
        placeholder: 'Write a list of interests…',
        value: attributes.interests,
        onChange: function (value) {
          props.setAttributes({
            interests: value
          });
        },
        className: 'interests',
      }),
      // Zombie statement heading
      el('h3', {}, 'Statement'),
      // Zombie statement field
      el(RichText, {
        tagName: 'div',
        className: "statement",
        placeholder: 'Write statement…',
        value: attributes.statement,
        onChange: function (value) {
          props.setAttributes({
            statement: value
          });
        },
      })
    );
  },

  // Stores content in the database and what is shown on the front end.
  // This is where we have to make sure the web component is used.
  save: function (props) {
    var attributes = props.attributes;
    return el(
      // The <zombie-profile web component
      'zombie-profile',
      // This is empty because the web component does not need any HTML attributes
      {},
      // Ensure a URL exists before it prints
      attributes.mediaURL &&
      // Print the image
      el('img', {
        src: attributes.mediaURL,
        slot: 'profile-image'
      }),
      attributes.name &&
      // Print the name
      el(RichText.Content, {
        tagName: 'span',
        slot: 'zombie-name',
        className: 'zname',
        value: attributes.name,
      }),
      attributes.age &&
      // Print the zombie's age
      el(RichText.Content, {
        tagName: 'span',
        slot: 'z-age',
        className: 'age',
        value: attributes.age,
    }),
      attributes.infectdate &&
      // Print the infection date
      el(RichText.Content, {
        tagName: 'span',
        slot: 'idate',
        className: 'infection-date',
        value: attributes.infectdate,
    }),
      // Need to verify something is in the first element since the interests's type is array
      attributes.interests[0] &&
      // Pint the interests
      el(RichText.Content, {
        tagName: 'ul',
        slot: 'z-interests',
        value: attributes.interests,
      }),
      attributes.statement[0] &&
      // Print the statement
      el(RichText.Content, {
        tagName: 'span',
        slot: 'statement',
        className: 'statement',
        value: attributes.statement,
    })
    );
    },
  });
})(
  //import the dependencies
  window.wp.blocks,
  window.wp.blockEditor,
  window.wp.element,
  window.wp.components
);
Now, wouldn’t it be great if some kind-hearted, article-writing, and totally-awesome person created a template that you could just plug your web component into and use on your site? Well that guy wasn’t available (he was off helping charity or something) so I did it. It’s up on github:
The plugin is a coding template that registers your custom web component, enqueues the scripts and styles the component needs, provides examples of the custom block fields you might need, and even makes sure things are styled nicely in the editor. Put this in a new folder in /wp-content/plugins like you would manually install any other WordPress plugin, make sure to update it with your particular web component, then activate it in WordPress on the “Installed Plugins” screen.
Not that bad, right?
Even though it looks like a lot of code, we’re really doing a few pretty standard WordPress things to register and render a custom web component. And, since we packaged it up as a plugin, we can drop this into any WordPress site and start publishing zombie profiles to our heart’s content.
I’d say that the balancing act is trying to make the component work as nicely in the WordPress block editor as it does on the front end. We would have been able to knock this out with a lot less code without that consideration.
Still, we managed to get the exact same component we made in my previous articles into a CMS, which allows us to plop as many zombie profiles on the site. We combined our knowledge of web components with WordPress blocks to develop a reusable block for our reusable web component.
What sort of components will you build for your WordPress site? I imagine there are lots of possibilities here and I’m interested to see what you wind up making.
The post Using Web Components in WordPress is Easier Than You Think appeared first on CSS-Tricks.
Have you already tried using WordPress headlessly with Gatsby? If you haven’t, you might check this article around the new Gatsby source plugin for WordPress; gatsby-source-wordpress is the official source plugin introduced in March 2021 as a part of the Gatsby 3 release. It significantly improves the integration with WordPress. Also, the WordPress plugin WPGraphQL providing the GraphQL API is now available via the official WordPress repository.
With stable and maintained tools, developing Gatsby websites powered by WordPress becomes easier and more interesting. I got myself involved in this field, I co-founded (with Alexandra Spalato), and recently launched Gatsby WP Themes — a niche marketplace for developers building WordPress-powered sites with Gatsby. In this article, I would love to share my insights and, in particular, discuss the search functionality.
Search does not come out of the box, but there are many options to consider. I will focus on two distinct possibilities — taking advantage of WordPress native search (WordPress search query) vs. using Jetpack Instant Search.
gatsby new gatsby-wordpress-w-search https://github.com/gatsbyjs/gatsby-starter-wordpress-blog
This simple, bare-bone starter creates routes exclusively for individual posts and blog pages. But we can keep it that simple here. Let’s imagine that we don’t want to include pages within the search results.
For the moment, I will leave the WordPress source website as it is and pull the content from the starter author’s WordPress demo. If you use your own source, just remember that there are two plugins required on the WordPress end (both available via the plugin repository):
WPGraphQL – a plugin that runs a GraphQL server on the WordPress instance
WPGatsby – a plugin that modifies the WPGraphQL schema in Gatsby-specific ways (it also adds some mechanism to optimize the build process)
Setting up Apollo Client
With Gatsby, we usually either use the data from queries run on page creation (page queries) or call the useStaticQuery hook. The latter is available in components and does not allow dynamic query parameters; its role is to retrieve GraphQL data at build time. None of those two query solutions works for a user’s-initiated search. Instead, we will ask WordPress to run a search query and send us back the results. Can we send a graphQL search query? Yes! WPGraphQL provides search; you can search posts in WPGraphQL like so:
posts(where: {search: "gallery"}) {
  nodes {
    id
    title
    content
  }
}
In order to communicate directly with our WPGraphQL API, we will install Apollo Client; it takes care of requesting and caching the data as well as updating our UI components.
yarn add @apollo/client cross-fetch
To access Apollo Client anywhere in our component tree, we need to wrap our app with ApolloProvider. Gatsby does not expose the App component that wraps around the whole application. Instead, it provides the wrapRootElement API. It’s a part of the Gatsby Browser API and needs to be implemented in the gatsby-browser.js file located at the project’s root.
// gatsby-browser.js
import React from "react"
import fetch from "cross-fetch"
import { ApolloClient, HttpLink, InMemoryCache, ApolloProvider } from "@apollo/client"
const cache = new InMemoryCache()
const link = new HttpLink({
  /* Set the endpoint for your GraphQL server, (same as in gatsby-config.js) */
  uri: "https://wpgatsbydemo.wpengine.com/graphql",
  /* Use fetch from cross-fetch to provide replacement for server environment */
  fetch
})
const client = new ApolloClient({
  link,
  cache,
})
export const wrapRootElement = ({ element }) => (
  <ApolloProvider client={client}>{element}</ApolloProvider>
)
SearchForm component
Now that we’ve set up ApolloClient, let’s build our Search component.
The SearchResults component receives the searchTerm via props, and that’s where we use Apollo Client.
For each searchTerm, we would like to display the matching posts as a list containing the post’s title, excerpt, and a link to this individual post. Our query will be like so:
const GET_RESULTS = gql`
  query($searchTerm: String) {
    posts(where: { search: $searchTerm }) {
      edges {
        node {
          id
          uri
          title
          excerpt
        }
      }
    }
  }
`
We will use the useQuery hook from @apollo-client to run the GET_RESULTS query with a search variable.
// src/components/search-results.js
import React from "react"
import { Link } from "gatsby"
import { useQuery, gql } from "@apollo/client"
const GET_RESULTS = gql`
  query($searchTerm: String) {
    posts(where: { search: $searchTerm }) {
      edges {
        node {
          id
          uri
          title
          excerpt
        }
      }
    }
  }
`
const SearchResults = ({ searchTerm }) => {
  const { data, loading, error } = useQuery(GET_RESULTS, {
    variables: { searchTerm }
  })
  if (loading) return <p>Searching posts for {searchTerm}...</p>
  if (error) return <p>Error - {error.message}</p>
  return (
    <section className="search-results">
      <h2>Found {data.posts.edges.length} results for {searchTerm}:</h2>
      <ul>
        {data.posts.edges.map(el => {
          return (
            <li key={el.node.id}>
              <Link to={el.node.uri}>{el.node.title}</Link>
            </li>
          )
        })}
      </ul>
    </section>
  )
}
export default SearchResults
The useQuery hook returns an object that contains loading, error, and data properties. We can render different UI elements according to the query’s state. As long as loading is truthy, we display <p>Searching posts...</p>. If loading and error are both falsy, the query has completed and we can loop over the data.posts.edges and display the results.
if (loading) return <p>Searching posts...</p>
if (error) return <p>Error - {error.message}</p>
// else
return ( //... )
For the moment, I am adding the <Search /> to the layout component. (I’ll move it somewhere else a little bit later.) Then, with some styling and a visible state variable, I made it feel more like a widget, opening on click and fixed-positioned in the top right corner.
Without the number of entries specified, the WPGraphQL posts query returns ten first posts; we need to take care of the pagination. WPGraphQL implements the pagination following the Relay Specification for GraphQL Schema Design. I will not go into the details; let’s just note that it is a standardized pattern. Within the Relay specification, in addition to posts.edges (which is a list of { cursor, node } objects), we have access to the posts.pageInfo object that provides:
endCursor – cursor of the last item in posts.edges,
startCursor – cursor of the first item in posts.edges,
hasPreviousPage – boolean for “are there more results available (backward),” and
hasNextPage – boolean for “are there more results available (forward).”
We can modify the slice of the data we want to access with the additional query variables:
first – the number of returned entries
after – the cursor we should start after
How do we deal with pagination queries with Apollo Client? The recommended approach is to use the fetchMore function, that is (together with loading, error and data) a part of the object returned by the useQuery hook.
// src/components/search-results.js
import React from "react"
import { Link } from "gatsby"
import { useQuery, gql } from "@apollo/client"
const GET_RESULTS = gql`
  query($searchTerm: String, $after: String) {
    posts(first: 10, after: $after, where: { search: $searchTerm }) {
      edges {
        node {
          id
          uri
          title
        }
      }
      pageInfo {
        hasNextPage
        endCursor
      }
    }
  }
`
const SearchResults = ({ searchTerm }) => {
  const { data, loading, error, fetchMore } = useQuery(GET_RESULTS, {
    variables: { searchTerm, after: "" },
  })
  if (loading && !data) return <p>Searching posts for {searchTerm}...</p>
  if (error) return <p>Error - {error.message}</p>
  const loadMore = () => {
    fetchMore({
      variables: {
        after: data.posts.pageInfo.endCursor,
      },
      // with notifyOnNetworkStatusChange our component re-renders while a refetch is in flight so that we can mark loading state when waiting for more results (see lines 42, 43)
      notifyOnNetworkStatusChange: true,
    })
  }

  return (
    <section className="search-results">
      {/* as before */}
      {data.posts.pageInfo.hasNextPage && (
        <button type="button" onClick={loadMore} disabled={loading}>
          {loading ? "Loading..." : "More results"}
        </button>
      )}
    </section>
  )
}
export default SearchResults
The first argument has its default value but is necessary here to indicate that we are sending a paginated request. Without first, pageInfo.hasNextPage will always be false, no matter the search keyword.
Calling fetchMore fetches the next slice of results but we still need to tell Apollo how it should merge the “fetch more” results with the existing cached data. We specify all the pagination logic in a central location as an option passed to the InMemoryCache constructor (in the gatsby-browser.js file). And guess what? With the Relay specification, we’ve got it covered — Apollo Client provides the relayStylePagination function that does all the magic for us.
// gatsby-browser.js
import { ApolloClient, HttpLink, InMemoryCache, ApolloProvider } from "@apollo/client"
import { relayStylePagination } from "@apollo/client/utilities"
const cache = new InMemoryCache({
  typePolicies: {
    Query: {
      fields: {
        posts: relayStylePagination(["where"]),
      },
    },
  },
})
/* as before */
Just one important detail: we don’t paginate all posts, but instead the posts that correspond to a specific where condition. Adding ["where"] as an argument to relayStylePagination creates a distinct storage key for different search terms.
Making search persistent
Right now my Search component lives in the Layout component. It’s displayed on every page but gets unmounted every time the route changes. What if we could keep the search results while navigating? We can take advantage of the Gatsby wrapPageElement browser API to set persistent UI elements around pages.
Let’s move <Search /> from the layout component to the wrapPageElement:
// gatsby-browser.js
import Search from "./src/components/search"
/* as before */
export const wrapPageElement = ({ element }) => {
  return <><Search />{element}</>
}
The APIs wrapPageElement and wrapRootElement exist in both the browser and Server-Side Rendering (SSR) APIs. Gatsby recommends that we implementwrapPageElement and wrapRootElement in both gatsby-browser.js and gatsby-ssr.js. Let’s create thegatsby-ssr.js (in the root of the project) and re-export our elements:
// gatsby-ssr.js
export { wrapRootElement, wrapPageElement } from "./gatsby-browser"
The wrapPageElement approach may not be ideal in all cases. Our search widget is “detached” from the layout component. It works well with the position “fixed” like in our working example or within an off-canvas sidebar like in this Gatsby WordPress theme.
But what if you want to have “persistent” search results displayed within a “classic” sidebar? In that case, you could move the searchTerm state from the Search component to a search context provider placed within the wrapRootElement:
// gatsby-browser.js
import SearchContextProvider from "./src/search-context"
/* as before */
export const wrapRootElement = ({ element }) => (
  <ApolloProvider client={client}>
    <SearchContextProvider>
      {element}
    </SearchContextProvider>
  </ApolloProvider>
)
Note how, since Apollo Client caches the search results, we immediately get them on the route change.
Results from posts and pages
If you checked the theme examples above, you might have noticed how I deal with querying more than just posts. My approach is to replicate the same logic for pages and display results for each post type separately.
Alternatively, you could use the Content Node interface to query nodes of different post types in a single connection:
const GET_RESULTS = gql`
  query($searchTerm: String, $after: String) {
    contentNodes(first: 10, after: $after, where: { search: $searchTerm }) {
      edges {
        node {
          id
          uri
          ... on Page {
            title
          }
          ... on Post {
            title
            excerpt
          }
        }
      }
      pageInfo {
        hasNextPage
        endCursor
      }
    }
  }
`
Going beyond the default WordPress search
Our solution seems to work but let’s remember that the underlying mechanism that actually does the search for us is the native WordPress search query. And the WordPress default search function isn’t great. Its problems are limited search fields (in particular, taxonomies are not taken into account), no fuzzy matching, no control over the order of results. Big websites can also suffer from performance issues — there is no prebuilt search index, and the search query is performed directly on the website SQL database.
There are a few WordPress plugins that enhance the default search. Plugins like WP Extended Search add the ability to include selected meta keys and taxonomies in search queries.
The Relevanssi plugin replaces the standard WordPress search with its search engine using the full-text indexing capabilities of the database. Relevanssi deactivates the default search query which breaks the WPGraphQL where: {search : …}. There is some work already done on enabling Relevanssi search through WPGraphQL; the code might not be compatible with the latest WPGraphQL version, but it seems to be a good start for those who opt for Relevanssi search.
In the second part of this article, we’ll take one more possible path and have a closer look at the premium service from Jetpack — an advanced search powered by Elasticsearch. By the way, Jetpack Instant search is the solution adopted by CSS-Tricks.
Using Jetpack Instant Search with Gatsby
Jetpack Search is a per-site premium solution by Jetpack. Once installed and activated, it will take care of building an Elasticsearch index. The search queries no longer hit the SQL database. Instead, the search query requests are sent to the cloud Elasticsearch server, more precisely to:
There are a lot of search parameters to specify within the URL above. In our case, we will add the following:
filter[bool][must][0][term][post_type]=post: We only need results that are posts here, simply because our Gatsby website is limited to post. In real-life use, you might need spend some time configuring the boolean queries.
size=10 sets the number of returned results (maximum 20).
with highlight_fields[0]=title, we get the title string (or a part of it) with the searchTerm within the <mark> tags.
highlight_fields[0]=content is the same as below but for the post’s content.
There are three more search parameters depending on the user’s action:
query: The search term from the search input, e.g. gallery
sort: how the results should be orderer, the default is by score "score_default" (relevance) but there is also "date_asc" (newest) and "date_desc" (oldest)
page_handle: something like the “after” cursor for paginated results. We only request 10 results at once, and we will have a “load more” button.
Now, let’s see how a successful response is structured:
{
  total: 9,
  corrected_query: false,
  page_handle: false, // or a string it the total value > 10
  results: [
    {
      _score: 196.51814,
      fields: {
        date: '2018-11-03 03:55:09',
        'title.default': 'Block: Gallery',
        'excerpt.default': '',
        post_id: 1918,
        // we can configure what fields we want to add here with the query search parameters
      },
      result_type: 'post',
      railcar: {/* we will not use this data */},
      highlight: {
        title: ['Block: <mark>Gallery</mark>'],
        content: [
          'automatically stretch to the width of your <mark>gallery</mark>. ... A four column <mark>gallery</mark> with a wide width:',
          '<mark>Gallery</mark> blocks have two settings: the number of columns, and whether or not images should be cropped',
        ],
      },
    },
    /* more results */
  ],
  suggestions: [], // we will not use suggestions here
  aggregations: [], // nor the aggregations
}
The results field provides an array containing the database post IDs. To display the search results within a Gatsby site, we need to extract the corresponding post nodes (in particular their uri ) from the Gatsby data layer. My approach is to implement an instant search with asynchronous calls to the rest API and intersect the results with those of the static GraphQL query that returns all post nodes.
Let’s start by building an instant search widget that communicates with the search API. Since this is not specific to Gatsby, let’s see it in action in this Pen:
Here, useDebouncedInstantSearch is a custom hook responsible for fetching the results from the Jetpack Search API. My solution uses the awesome-debounce-promise library that allows us to take some extra care of the fetching mechanism. An instant search responds to the input directly without waiting for an explicit “Go!” from the user. If I’m typing fast, the request may change several times before even the first response arrives. Thus, there might be some unnecessary network bandwidth waste. The awesome-debounce-promise waits a given time interval (say 300ms) before making a call to an API; if there is a new call within this interval, the previous one will never be executed. It also resolves only the last promise returned from the call — this prevents the concurrency issues.
Now, with the search results available, let’s move back to Gatsby and build another custom hook:
import {useStaticQuery, graphql} from "gatsby"

export const useJetpackSearch = (params) => {
  const {
    allWpPost: { nodes },
  } = useStaticQuery(graphql`
    query AllPostsQuery {
      allWpPost {
        nodes {
          id
          databaseId
          uri
          title
          excerpt
        }
      }
    }
  `)
  const { error, loading, data } = useDebouncedInstantSearch(params)
  return {
    error,
    loading,
    data: {
      ...data,
      // map the results
      results: data.results.map(el => {
        // for each result find a node that has the same databaseId as the result field post_id
        const node = nodes.find(item => item.databaseId === el.fields.post_id)
        return {
          // spread the node
          ...node,
          // keep the highlight info
          highlight: el.highlight
        }
      }),
    }
  }
}
I will call the useJetpackSearch within <SearchResults />. The Gatsby-version of <SearchResults /> is almost identical as that in the Pen above. The differences are highlighted in the code block below. The hook useDebouncedInstantSearch is replaced by useJetpackSearch (that calls the former internally). There is a Gatsby Link that replaces h2 as well as el.fields["title.default"] and el.fields["excerpt.default"] are replaced by el.title and el.excerpt.
You can find the complete code in this repo and see it in action in this demo. Note that I no longer source WordPress data from the generic WordPress demo used by Gatsby starter. I need to have a website with Jetpack Search activated.
Wrapping up
We’ve just seen two ways of dealing with search in headless WordPress. Besides a few Gatsby-specific technical details (like using Gatsby Browser API), you can implement both discussed approaches within other frameworks. We’ve seen how to make use of the native WordPress search. I guess that it is an acceptable solution in many cases.
But if you need something better, there are better options available. One of them is Jetpack Search. Jetpack Instant Search does a great job on CSS-Tricks and, as we’ve just seen, can work with headless WordPress as well. There are probably other ways of implementing it. You can also go further with the query configuration, the filter functionalities, and how you display the results.
I wonder where headless WordPress will land. And by “headless” I mean only using the WordPress admin and building out the user-facing site through the WordPress REST API rather than the traditional WordPress theme structure.
Is it… big? The future of WordPress? Or relatively niche?
Where’s the demand?
Certainly, there is demand for it. I know plenty of people doing it. For instance, Gatsby has a gatsby-source-wordpress plugin that allows you to source content from a WordPress site in a way that consumes the WordPress REST API and caches it as GraphQL for use in a React-powered Gatsby site. It has been downloaded 59k times this month and 851k times overall, as I write. That’s a healthy chunk of usage for one particular site-building technology. Literally, every use of gatsby-source-wordpress is using WordPress headlessly—that’s just what it is/does. If you’re interested in this, here’s Ganesh Dahaldigging deep into it.
And that’s just one thing, it doesn’t factor in entire companies and products dedicated to the idea.
What is headless an improve to?
The Gatsby integration makes a solid case for why anyone would consider a headless WordPress site. I’ll get to that.
Many advocate the reason is architectural. It de-couples the back end from the front end. It tears down the monolith. As a de-coupled system, the back and front ends can evolve independently. And yet, I’m less hot on that idea as years go by. For example, I’d argue that the chances of simply ripping out WordPress and replace it with another CMS in a headless setup like this is easier said than done. Also, the idea that I’m going to use the WordPress API not just to power a website, but also a native reading app, and some digital internet-connected highway billboard or something is not a use case that’s exploding in popularity as far as I can tell.
The real reason I think people reach for a WordPress back end for a Gatsby-driven front end is essentially this: they like React. They like building things from components. They like the fast page transitions. They like being able to host things somewhere Jamstack-y with all the nice developer previews and such. They like the hot module reloading. They like Prettier and JSX. They just like it, and I don’t blame them. When you enjoy that kind of developer experience, going back to authoring PHP templates where it takes manually refreshing the browser and maintaining some kind of hand-rolled build process isn’t exactly enticing.
Frontity is another product looking to hone in on React + WordPress. Geoff and Sarah shared how to do all this last year on the Vue/Nuxt side.
But will headless WordPress become more popular than the traditional theming model of WordPress that’s based on PHP templates that align to an explicit structure? Nah. Well, maybe it would if WordPress itself champions the idea and offers guidance, training, and documentation that make it easier for developers to adopt that approach. I’d buy into it if WordPress says that a headless architecture is the new course of direction. But none of those things are true. Consequently, to some degree, it’s a niche thing.
Just how niche is headless?
WP Engine is a big WordPress host and has a whole thing called Atlas. And that effort definitely looks like they are taking this niche market seriously. I’m not 100% sure what Atlas all is, but it looks like a dashboard for spinning up sites with some interesting looking code-as-config. One of the elephants in the room with headless WordPress is that, well, now you have two websites to deal with. You have wherever you are hosting and running WordPress, and wherever you are hosting and running the site that consumes the WordPress APIs. Maybe this brings those two things together somehow. The deploy-from-Git-commits thing is appealing and what I’d consider table stakes for modern hosting these days.
Another reason people are into headless WordPress is that the end result can be static, as in, pre-generated HTML pages. That means the server for your website can be highly CDN-ized, as it’s literally only static assets that are instantly available to download. There’s no PHP or database for server-side rendering things, which can be slow (and, to be fair, dealt with) since it adds a process ahead of rendering.
What’s “the WordPress way” for going headless?
I’d lump any service that builds a static version of your WordPress site into the headless WordPress bucket. That’s because, ultimately, those sites are using WordPress APIs to build those static files, just like Gatsby or whatever else would do.
That’s what Strattic does. They spin up a WordPress site for you that they consider staging. You do your WordPress work there, then use their publish system to push a static version of your site to production. That’s compelling because it solves for something that other headless WordPress usage doesn’t: just doing things the WordPress way.
For example, custom WordPress blocks or plugins might produce output that not only contains custom HTML, but CSS and JavaScript as well. Imagine a “carousel” block or plugin. That carousel isn’t going to work if all you’re doing is grabbing the post content from an API and dunking it onto a page. You’ll either need to go extract the CSS and JavaScript from elsewhere and include it, or somehow just know that isn’t how you do things anymore. You might attach the images as metadata somehow, pull them client-side, and do your own implementation of a carousel. With Strattic, theoretically, it’ll work as the HTML, CSS, and JavaScript is still present on the static site. But notably, you don’t have PHP, so Strattic had to hand-build form integrations, they use client-side Algolia for search, Disqus for comments, etc., because there is no server-side language available.
Shifter is another player here. It’s similar to Strattic where you work on your site in the WordPress admin, then publish to a static site. I believe Shifter even spins your WordPress site down when it’s not in use, which makes sense since the output is static and there is no reason a server with PHP and MySQL needs to be running. As an alternative, Shifter has a headless-only WordPress setup that presumably stays spun up all the time for outside API usage.
It’s fun to think about all this stuff
But as I do, I realize that the ideas and discussions around headless WordPress are mostly focused on the developer. WordPress has this huge market of people who just are not developers. Yet, they administer a WordPress site, taking advantage of the plugin and theme ecosystem. That’s kinda cool, and it’s impressive that WordPress serves both markets so well. There’s just a heck of a lot more WordPress site owners who aren’t developers than those who are, I reckon, so that alone will keep headless WordPress from being anything more than a relatively niche concept for some time. But, ya know, if they wanna put GraphQL in core, I’ll still take it kthxbye.
We use cookies on our website to give you the most relevant experience by remembering your preferences and repeat visits. By clicking “Accept”, you consent to the use of ALL the cookies.
This website uses cookies to improve your experience while you navigate through the website. Out of these, the cookies that are categorized as necessary are stored on your browser as they are essential for the working of basic functionalities of the website. We also use third-party cookies that help us analyze and understand how you use this website. These cookies will be stored in your browser only with your consent. You also have the option to opt-out of these cookies. But opting out of some of these cookies may affect your browsing experience.
Necessary cookies are absolutely essential for the website to function properly. These cookies ensure basic functionalities and security features of the website, anonymously.
Cookie
Duration
Description
cookielawinfo-checkbox-analytics
11 months
This cookie is set by GDPR Cookie Consent plugin. The cookie is used to store the user consent for the cookies in the category "Analytics".
cookielawinfo-checkbox-functional
11 months
The cookie is set by GDPR cookie consent to record the user consent for the cookies in the category "Functional".
cookielawinfo-checkbox-necessary
11 months
This cookie is set by GDPR Cookie Consent plugin. The cookies is used to store the user consent for the cookies in the category "Necessary".
cookielawinfo-checkbox-others
11 months
This cookie is set by GDPR Cookie Consent plugin. The cookie is used to store the user consent for the cookies in the category "Other.
cookielawinfo-checkbox-performance
11 months
This cookie is set by GDPR Cookie Consent plugin. The cookie is used to store the user consent for the cookies in the category "Performance".
viewed_cookie_policy
11 months
The cookie is set by the GDPR Cookie Consent plugin and is used to store whether or not user has consented to the use of cookies. It does not store any personal data.
Functional cookies help to perform certain functionalities like sharing the content of the website on social media platforms, collect feedbacks, and other third-party features.
Performance cookies are used to understand and analyze the key performance indexes of the website which helps in delivering a better user experience for the visitors.
Analytical cookies are used to understand how visitors interact with the website. These cookies help provide information on metrics the number of visitors, bounce rate, traffic source, etc.
Advertisement cookies are used to provide visitors with relevant ads and marketing campaigns. These cookies track visitors across websites and collect information to provide customized ads.