If you’re building a WordPress site, you need a good reason not to choose a WordPress form plugin. They are convenient and offer plenty of customizations that would take a ton of effort to build from scratch. They render the HTML, validate the data, store the submissions, and provide integration with third-party services.
But suppose we plan to use WordPress as a headless CMS. In this case, we will be mainly interacting with the REST API (or GraphQL). The front-end part becomes our responsibility entirely, and we can’t rely anymore on form plugins to do the heavy lifting in that area. Now we’re in the driver’s seat when it comes to the front end.
Forms were a solved problem, but now we have to decide what to do about them. We have a couple of options:
Do we use our own custom API if we have such a thing? If not, and we don’t want to create one, we can go with a service. There are many good static form providers, and new ones are popping up constantly.
Can we keep using the WordPress plugin we already use and leverage its validation, storage, and integration?
The most popular free form plugin, Contact Form 7, has a submission REST API endpoint, and so does the well-known paid plugin, Gravity Forms, among others.
From a technical standpoint, there’s no real difference between submitting the form‘s data to an endpoint provided by a service or a WordPress plugin. So, we have to decide based on different criteria. Price is an obvious one; after that is the availability of the WordPress installation and its REST API. Submitting to an endpoint presupposes that it is always available publicly. That’s already clear when it comes to services because we pay for them to be available. Some setups might limit WordPress access to only editing and build processes. Another thing to consider is where you want to store the data, particularly in a way that adheres to GPDR regulations.
When it comes to features beyond the submission, WordPress form plugins are hard to match. They have their ecosystem, add-ons capable of generating reports, PDFs, readily available integration with newsletters, and payment services. Few services offer this much in a single package.
Even if we use WordPress in the “traditional” way with the front end based on a WordPress theme, using a form plugin’s REST API might make sense in many cases. For example, if we are developing a theme using a utility-first CSS framework, styling the rendered form with fixed markup structured with a BEM-like class convention leaves a sour taste in any developer’s mouth.
The purpose of this article is to present the two WordPress form plugins submission endpoints and show a way to recreate the typical form-related behaviors we got used to getting out of the box. When submitting a form, in general, we have to deal with two main problems. One is the submission of the data itself, and the other is providing meaningful feedback to the user.
So, let’s start there.
The endpoints
Submitting data is the more straightforward part. Both endpoints expect a POST request, and the dynamic part of the URL is the form ID.
Contact Form 7 REST API is available immediately when the plugin is activated, and it looks like this:
The Gravity Forms REST API is disabled by default. To enable it, we have to go to the plugin’s settings, then to the REST API page, and check the “Enable access to the API” option. There is no need to create an API key, as the form submission endpoint does not require it.
The body of the request
Our example form has five fields with the following rules:
a required text field
a required email field
a required date field that accepts dates before October 4, 1957
an optional textarea
a required checkbox
For Contact Form 7’s request’s body keys, we have to define them with the form-tags syntax:
Gravity Forms expects the keys in a different format. We have to use an auto-generated, incremental field ID with the input_ prefix. The ID is visible when you are editing the field.
We can save ourselves a lot of work if we use the expected keys for the inputs’ name attributes. Otherwise, we have to map the input names to the keys.
Putting everything together, we get an HTML structure like this for Contact Form 7:
<form action="https://your-site.tld/wp-json/contact-form-7/v1/contact-forms/<FORM_ID>/feedback" method="post">
  <label for="somebodys-name">Somebody's name</label>
  <input id="somebodys-name" type="text" name="somebodys-name">
  <!-- Other input elements -->
  <button type="submit">Submit</button>
</form>
In the case of Gravity Forms, we only need to switch the action and the name attributes:
<form action="https://your-site.tld/wp-json/gf/v2/forms/<FORM_ID>/submissions" method="post">
  <label for="input_1">Somebody's name</label>
  <input id="input_1" type="text" name="input_1">
  <!-- Other input elements -->
  <button type="submit">Submit</button>
</form>
Since all the required information is available in the HTML, we are ready to send the request. One way to do this is to use the FormData in combination with the fetch:
const formSubmissionHandler = (event) => {
  event.preventDefault();

  const formElement = event.target,
    { action, method } = formElement,
    body = new FormData(formElement);

  fetch(action, {
    method,
    body
  })
    .then((response) => response.json())
    .then((response) => {
      // Determine if the submission is not valid
      if (isFormSubmissionError(response)) {
        // Handle the case when there are validation errors
      }
      // Handle the happy path
    })
    .catch((error) => {
      // Handle the case when there's a problem with the request
    });
};

const formElement = document.querySelector("form");

formElement.addEventListener("submit", formSubmissionHandler);
We can send the submission with little effort, but the user experience is subpar, to say the least. We owe to users as much guidance as possible to submit the form successfully. At the very least, that means we need to:
show a global error or success message,
add inline field validation error messages and possible directions, and
draw attention to parts that require attention with special classes.
Field validation
On top of using built-in HTML form validation, we can use JavaScript for additional client-side validation and/or take advantage of server-side validation.
When it comes to server-side validation, both Contact Form 7 and Gravity Forms offer that out of the box and return the validation error messages as part of the response. This is convenient as we can control the validation rules from the WordPress admin.
For more complex validation rules, like conditional field validation, it might make sense to rely only on the server-side because keeping the front-end JavaScript validation in sync with the plugins setting can become a maintenance issue.
If we solely go with the server-side validation, the task becomes about parsing the response, extracting the relevant data, and DOM manipulation like inserting elements and toggle class-names.
Response messages
The response when there is a validation error for Contact Form 7 look like this:
{
  "into": "#",
  "status": "validation_failed",
  "message": "One or more fields have an error. Please check and try again.",
  "posted_data_hash": "",
  "invalid_fields": [
    {
      "into": "span.wpcf7-form-control-wrap.somebodys-name",
      "message": "The field is required.",
      "idref": null,
      "error_id": "-ve-somebodys-name"
    },
    {
      "into": "span.wpcf7-form-control-wrap.any-email",
      "message": "The field is required.",
      "idref": null,
      "error_id": "-ve-any-email"
    },
    {
      "into": "span.wpcf7-form-control-wrap.before-space-age",
      "message": "The field is required.",
      "idref": null,
      "error_id": "-ve-before-space-age"
    },
    {
      "into": "span.wpcf7-form-control-wrap.fake-terms",
      "message": "You must accept the terms and conditions before sending your message.",
      "idref": null,
      "error_id": "-ve-fake-terms"
    }
  ]
}
On successful submission, the response looks like this:
{
  "into": "#",
  "status": "mail_sent",
  "message": "Thank you for your message. It has been sent.",
  "posted_data_hash": "d52f9f9de995287195409fe6dcde0c50"
}
Compared to this, Gravity Forms’ validation error response is more compact:
{
  "is_valid": false,
  "validation_messages": {
    "1": "This field is required.",
    "2": "This field is required.",
    "3": "This field is required.",
    "5": "This field is required."
  },
  "page_number": 1,
  "source_page_number": 1
}
But the response on a successful submission is bigger:
{
  "is_valid": true,
  "page_number": 0,
  "source_page_number": 1,
  "confirmation_message": "<div id='gform_confirmation_wrapper_1' class='gform_confirmation_wrapper '><div id='gform_confirmation_message_1' class='gform_confirmation_message_1 gform_confirmation_message'>Thanks for contacting us! We will get in touch with you shortly.</div></div>",
  "confirmation_type": "message"
}
While both contain the information we need, they don‘t follow a common convention, and both have their quirks. For example, the confirmation message in Gravity Forms contains HTML, and the validation message keys don’t have the input_ prefix — the prefix that’s required when we send the request. On the other side, validation errors in Contact Form 7 contain information that is relevant only to their front-end implementation. The field keys are not immediately usable; they have to be extracted.
In a situation like this, instead of working with the response we get, it’s better to come up with a desired, ideal format. Once we have that, we can find ways to transform the original response to what we see fit. If we combine the best of the two scenarios and remove the irrelevant parts for our use case, then we end up with something like this:
{
  "isSuccess": false,
  "message": "One or more fields have an error. Please check and try again.",
  "validationError": {
    "somebodys-name": "This field is required.",
    "any-email": "This field is required.",
    "input_3": "This field is required.",
    "input_5": "This field is required."
  }
}
And on successful submission, we would set isSuccess to true and return an empty validation error object:
{
  "isSuccess": true,
  "message": "Thanks for contacting us! We will get in touch with you shortly.",
  "validationError": {}
}
Now it’s a matter of transforming what we got to what we need. The code to normalize the Contact Forms 7 response is this:
const normalizeContactForm7Response = (response) => {
  // The other possible statuses are different kind of errors
  const isSuccess = response.status === 'mail_sent';
  // A message is provided for all statuses
  const message = response.message;
  const validationError = isSuccess
    ? {}
    : // We transform an array of objects into an object
    Object.fromEntries(
      response.invalid_fields.map((error) => {
        // Extracts the part after "cf7-form-control-wrap"
        const key = /cf7[-a-z]*.(.*)/.exec(error.into)[1];

        return [key, error.message];
      })
    );

  return {
    isSuccess,
    message,
    validationError,
  };
};
The code to normalize the Gravity Forms response winds up being this:
const normalizeGravityFormsResponse = (response) => {
  // Provided already as a boolean in the response
  const isSuccess = response.is_valid;
  const message = isSuccess
    ? // Comes wrapped in a HTML and we likely don't need that
      stripHtml(response.confirmation_message)
    : // No general error message, so we set a fallback
      'There was a problem with your submission.';
  const validationError = isSuccess
    ? {}
    : // We replace the keys with the prefixed version;
      // this way the request and response matches
      Object.fromEntries(
        Object.entries(
            response.validation_messages
        ).map(([key, value]) => [`input_${key}`, value])
      );

  return {
    isSuccess,
    message,
    validationError,
  };
};
We are still missing a way to display the validation errors, success messages, and toggling classes. However, we have a neat way of accessing the data we need, and we removed all of the inconsistencies in the responses with a light abstraction. When put together, it’s ready to be dropped into an existing codebase, or we can continue building on top of it.
There are many ways to tackle the remaining part. What makes sense will depend on the project. For situations where we mainly have to react to state changes, a declarative and reactive library can help a lot. Alpine.js was covered here on CSS-Tricks, and it’s a perfect fit for both demonstrations and using it in production sites. Almost without any modification, we can reuse the code from the previous example. We only need to add the proper directives and in the right places.
Wrapping up
Matching the front-end experience that WordPress form plugins provide can be done with relative ease for straightforward, no-fuss forms — and in a way that is reusable from project to project. We can even accomplish it in a way that allows us to switch the plugin without affecting the front end.
Sure, it takes time and effort to make a multi-page form, previews of the uploaded images, or other advanced features that we’d normally get baked right into a plugin, but the more unique the requirements we have to meet, the more it makes sense to use the submission endpoint as we don’t have to work against the given front-end implementation that tries to solve many problems, but never the particular one we want.
Using WordPress as a headless CMS to access the REST API of a form plugin to hit the submissions endpoints will surely become a more widely used practice. It’s something worth exploring and to keep in mind. In the future, I would not be surprised to see WordPress form plugins designed primarily to work in a headless context like this. I can imagine a plugin where front-end rendering is an add-on feature that’s not an integral part of its core. What consequences that would have, and if it could have commercial success, remains to be explored but is a fascinating space to watch evolve.
In my previous article, I discussed how I learned to create a decoupled WordPress powered Gatsby site using the Gatsby Source WPGraphQL plugin. The project was done following the ongoing developmental version of WPGraphQL and an excellent tutorial by Henrik Wirth. Although WPGraphQL was used in some production sites at that time, there were lot of iterations that introduced breaking changes. Since the release of WPGraphQL v1.0 last November, the plugin is stable and available via the WordPress plugin directory.
The WPGraphQL plugin can be used to create a site that uses WordPress for content management, but with a front-end that’s driven by Gatsby. We call this a “decoupled” or “headless” CMS because the site’s back-end and front-end are separate entities that still talk to one another via APIs where components on the front end consume data from the CMS.
The Denver Post, The Twin Cities Pioneer Press, The San Jose Mercury News, and Credit Karma have a decoupled WordPress site with WPGraphQL.
In the true sense of a “decoupled” or “headless” site, WPGraphQL can be used to port WordPress data to other frameworks, like Next.js, Vue.js, among others. For the Gatsby framework, the Gatsby Source WordPress plugin is recommended, and it utilizes WPGraphQL to source data from WordPress.
Let’s set everything up together and tour the plugin.
Prerequisites
In my previous article, we covered the prerequisites needed for setting up WordPress and Gatsby sites, and porting back-end WordPress data to a Gatsby-powered front-end site with site deployment. I’m skipping a lot of those details here because the fundamental concepts are the same for this article, except that WordPress data is fetched by the Gatsby Source WordPress plugin this time.
If you are new to Gatsby and just now jumping into Gatsby’s generated static site generator bandwagon, I’d suggest reading “An Honest Review of Gatsby” by React expert David Cramer and “Gatsby vs Next.js” by Jared Palmer. What we’re going to cover isn‘t for everyone, and these articles may be helpful to evaluate for yourself whether it’s the right technology for you and your project.
This article is not a step-by-step guide on how to use Gatsby Source WordPress Plugin. Again, that’s already available in Gatsby’s documentation. Conversely, if you happen to be an expert in React, JavaScript, Node.js or GraphQL, then what we cover here is probably stuff you already know. This article is an opinion piece based on my personal experience, which I hope is useful for the average WordPress user with basic working knowledge on the subject.
And, before we get started, it’s worth mentioning that the Gatsby Source WordPress plugin was completely rewritten in version 4 and uses WPGraphQL as its data source. The previous release, version 3, was built with REST API as its data source. Since the stable version of the plugin was recently released, the number of starter themes and demos that support it are limited.
First, we need WordPress
For this project, I set up a fresh WordPress site with Local by Flywheel that uses the default Twenty Twenty theme. I imported theme unit test data for pages and posts, as described in the WordPress Codex. While this was the baseline I was working with, this could have just as easily been an existing WordPress site that’s either on a remote server or a local install.
Now that we have an established baseline, we can log into the WordPress admin and install the WPGraphQL and WPGatsby plugins we need and activate them.
As we covered in the previous article, what this does is expose GraphQL and WPGraphiQL API in the WordPress admin, allowing the GraphiQL API to create a “playground” for testing GraphQL queries based on WordPress data.
The GraphiQL screen provides three panels: one to navigate between different objects (left), one to query data (center), and one to visualize the returned data (right).
According to Gatsby tutorials, there are three options for creating a WordPress-powered Gatsby site. Let’s look at each one.
Option 1: Using the Gatsby starter
The docs have a step-by-step guide on how to set up a WordPress-Gatsby site, but here’s the gist.
Run the following in the command line to fetch the starter from GitHub repository and clone it into a my-wpstarter project folder:
#! clone starter repo
gatsby new my-wpstarter https://github.com/gatsbyjs/gatsby-starter-wordpress-blog
Then, install the npm packages
#! npm
npm install

#! or yarn
yarn install
Now that the starter is cloned, let’s open the gatsby-config.js file in our code editor and update its URL option to fetch data from our WordPress endpoint (see above).
// gatsby-config.js
{
  resolve: gatsby-source-wordpress,
    options: {
     // WordPress is the GraphQL url.
     url: process.env.WPGRAPHQL_URL || https://wpgatsbydemo.wpengine.com/graphql,
  },
},
Now, we’ll replace the starter’s data source endpoint URL with our own WordPress site URL:
Let’s make sure we are in the my-wpstarter project directory. From the project folder, we’ll run the gatsby develop command to build our new Gatsby site from our WordPress data source endpoint. In the terminal we should be able see the gatsby-source-wordpress plugin fetching data, including errors and successful site processes along the way.
If we see a success Building development bundle message at the end, that means the Gatsby site build process is complete and the site can be viewed at http://localhost:8000.
This is a bare-bone starter blog with basic files and a few components. It’s file structure is very similar to the gatsby-starter-blog, except this one has a templates folder that includes blog-post.js and blog-post-achive.js template files.
When we view the GraphiQL API explorer at http://localhost:8000/___graphql we can see all of the data from WordPress exposed by WPGraphQL, as well as query and retrieve specific data right from the UI.
This example shows a query for menu items in WordPress (middle panel) and the returned data of that query (right panel).
You got it! Gatsby assumes the rest is up to us to build, using Gatsby components that pull in WordPress data for the presentation.
We’ll spin up a new project from the command line:
#! create a new Gatsby site
gatsby new wpgatsby-from-scratch-demo
This gets us a wpgatsby-from-scratch-demo folder that includes the starter theme. From here, we’ll cd into that folder and start developing:
cd wpgatsby-from-scratch-demo
gatsby develop
Now we can open up http://localhost:8000 in the browser and get the welcome page.
Now we are good to go to get start grabbing data from our WordPress site. Let’s install the Gatsby Source Plugin:
#! install with rpm
npm install gatsby-source-wordpress

#! install with yarn
yarn add Gatsby-source-wordpress
If we check our browser now, you’ll noticed that nothing happens — we still get the same Gatsby welcome. To fetch our WordPress site data, we need to add the plugin to the gatsby-config.js file. Open the file and insert the following:
// gatsby-config.js
module.exports = {
  siteMetadata: {
    // ...
  },
  plugins: [
  // Add Gatsby-source-wordpress plugin
  {
      resolve: `gatsby-source-wordpress`,
      options: {
        /*
         * The full URL of the WordPress site's GraphQL API.
         * Example : 'https://www.example-site.com/graphql'
         */
        url: `http://gatsbywpv4.local/graphql`,
       },
     },
    // The following plugins are not required for gatsby-source-wordpress ....
  ],
}
Just like last time, we need to change the WordPress data endpoint source to the URL of our WordPress site. Let’s run gatsby develop in our terminal to start things up.
Now we see that the createPages function is running successfully to build a development bundle (left), and that WordPress data for posts, pages, taxonomies, users, menus, and everything else are fetched (right).
However, when we open http://localhost:8000 in our browser, nothing seems to happen. We still see the same welcome screen. But if we examine GraphiQL in our browser (at http://localhost:8000/___graphql) then we see all WordPress data exposed to our Gatsby site that we can query and display as we want.
GraphiQL shows that WordPress data is indeed exposed and we are able to create and execute queries.
Let’s test the following query I pulled straight from Gatsby’s tutorial, in the GraphiQL explorer:
query {
  allWpPost {
    nodes {
      id
      title
      excerpt
      slug
      date(formatString: "MMMM DD, YYYY")
    }
  }
}
When we run the above query, we will see the allWpPost.nodes property value, with sub properties for id, title, excerpt, and others.
Now, let’s open our src/components/pages/index.js component file and replace the code with this:
// src/components/pages/index.js
import  React from "react"
import { graphql } from "gatsby"
import Layout from "../components/layout"
import SEO from "../components/seo"

export default function Home({ data }) {
  return (
    <Layout>
      <SEO title="home" />
      <h1>My WordPress Blog</h1>
      <h4>Posts</h4>
      {data.allWpPost.nodes.map(node => (
        <div>
          <p>{node.title}</p>
          <div dangerouslySetInnerHTML={{ __html: node.excerpt }} />
        </div>
      ))}
    </Layout>
  )
}

export const pageQuery = graphql`
  query {
    allWpPost(sort: { fields: [date] }) {
      nodes {
        title
        excerpt
        slug
      }
    }
  }
`
Save it, restart the server with gatsby develop, and refresh the page. If the build was successful, then our site’s homepage should display a list of sorted blog posts from WordPress!
As described in the tutorial, Gatsby uses createPages API, or what it calls as its “workhorse” API, to programmatically create pages from data (from Markdown or WordPress). Unlike Markdown data, we don’t need to create a slug here because each WordPress post has its own unique slug which can be fetched from the WordPress data endpoint.
Creating pages for each post
Gatsby uses the gatsby-node.js file, located at the root of our project, to programmatically create blog post. Let’s open the gatsby-node.js file in our text editor add the following code from the tutorial.
As noted in the Gatsby Part 7 tutorial, the above code is the first part of creating our post pages from WordPress data source. Following the guide, let’s restart our server and develop our site with gatsby develop.
We should see console.log output in our terminal as pages being build). However, our homepage still looks the same. To create single posts, Gatsby requires templates to build pages, which we will create in next step.. That’s what we’ll do next.
Creating blog post templates
Let’s create a src/components/templates folder in the src/ directory and create a blog-post.js file by pasting the following code snippets from the tutorial:
// src/templates/blog-post.js
import React from "react"
import Layout from "../components/layout"
import { graphql } from "gatsby"

export default function BlogPost({ data }) {
  const post = data.allWpPost.nodes[0]
  console.log(post)
  return (
    <Layout>
      <div>
        <h1>{post.title}</h1>
        <div dangerouslySetInnerHTML={{ __html: post.content }} />
      </div>
    </Layout>
  )
}
export const query = graphql`
  query($slug: String!) {
    allWpPost(filter: { slug: { eq: $slug } }) {
      nodes {
        title
        content
      }
    }
  }
`
As explained in the tutorial, the above code snippets create a single post with React JSX and wraps post.title and post.content (lines 12-13) around the src/components/layout.js components. At the bottom section of the file, a GraphQL query is added and calls a specific post based on the post slug variable $slug. This variable is passed to the blog-post.js template when the page is created in gatsby-node.js.
Next we should also update lines 12-13 of our gatsby-node.js file with the following code from the tutorial.
Let‘s stop and restart our local server with gatsby develop and view the site. We won’t see our homepage with a list of blog post links. However, if we check with http://localhost:8000/abcdf we should see the following 404 page with a list of individual pages and posts links.
If we check http://localhost:8000/hello-gatsby-world, we should our “Hello Gatsby WordPress World” post in all its glory.
The next step is to link the post titles from the homepage to the actual posts.
Linking to posts from the homepage
Linking the work from the homepage to post pages is done by wrapping post titles in the index.js file with Gatsby‘s Link component. Let’s open the index.js file that we created earlier and add the Link component:
// src/components/pages/index.js
import React from "react"
import { Link, graphql } from "gatsby"
import Layout from "../components/layout"
import SEO from "../components/seo"

export default function Home({ data }) {
  return (
    <Layout>
      <SEO title="home" />
     {/* <h1>My WordPress Blog</h1>
      <h4>Posts</h4> */}
      {data.allWpPost.nodes.map(node => (
        <div key={node.slug}>
          <Link to={node.slug}>
            <h2>{node.title}</h2>
          </Link>
          <div dangerouslySetInnerHTML={{ __html: node.excerpt }} />
        </div>
      ))}
    </Layout>
  )
}

export const pageQuery = graphql`
  query {
    allWpPost(sort: { fields: [date], order: DEC  }) {
      nodes {
        title
        excerpt
        slug
      }
    }
  }
`
We imported the Link component from Gatsby and then wrapped the post title with the Link component and reference the slug of the post. Let’s clean up the code by commenting out the page title, changing the title element to <h2>, and adding sorted posts order to DEC in our graphql query as well as the gatsby-node.js file.
As we did earlier, let’s stop and restart the development server with gatsby develop, and view our homepage at http://localhost:8000. The post title should link to single post page.
You can apply the same procedure to calling and creating pages, custom post types, custom fields, taxonomies, and all the fun and flexible content WordPress is known for. This can be as simple or as complex as you would like it to be, so explore and have fun with it!
Option 3: Using Gatsby’s WordPress Twenty Twenty Starter
Gatsby’s starter template for the default WordPress Twenty Twenty theme is created and maintained by Henrik Wirth, who also has an extremely detailed and thorough step-by-step guide that you might recall from my previous article. This starter, unlike the others, is actually updated to version 4 of the Gatsby Source Plugin and works out of the box after the initial WordPress setup described in the documentation. It maintains the same Twenty Twenty styling in the Gatsby front-end site, but has few limitations — including, comments, monthly archive pages, and tags — that are unsupported.
First let’s clone the starter in our twenty-twenty-starter folder.
#! clone gatsby-starter-wordpress-twenty-twenty
gatsby new twenty-twenty-starter https://github.com/henrikwirth/gatsby-starter-wordpress-twenty-twenty
Let’s cd into that folder and then run gatsby develop to spin up the site. It won’t work properly the first time because we have not changed our WPGRAPHQL_URL value yet in the env.example file. We need to rename the file from .env.example to simply .env, as suggested in the documentation.
After that, restart the development server with gatsby develop. It should build the site successfully.
The menu may or may not appear depending on how the WordPress menu is named. The starter’s menu slug for querying menu items is primary in Menu.js (line 8). Because I had set my WordPress site up using main-menu instead, I had to update the Menu.js file accordingly.
Because the starter was tested with older versions of our tools , I decided bump up the plugins to the latest versions — WPGraphQL 1.2.6, WPGatsby 1.0.6, and Gatsby Source WordPress 4.0.1 — and it worked fine without any errors.
This starter uses the same CSS that the default WordPress Twenty Twenty theme does, and the same assets folder, including fonts, images, SVG files, and other files that are included in the default theme.
If you are happy with WordPress Twenty Twenty styling, then that’s it. Enjoy your new decoupled Gatsby site!
But let’s say we want to work with custom styles. The CSS files are imported from the assets folder via the gatsby-browser.js file.
Let’s modify the styles for the site’s header, footer, posts and pages. Gatsby provides different options to style its components and, in this project, I followed the CSS module for styling and modified CSS markup of the Twenty Twenty starter components accordingly.
We can start by creating a style folder at src/components/styles and, inside it, a base folder. Here’s the general file structure we’re aiming for:
#! partial structure of /style folder
src
 |--/components
   |--/styles
     |--main.css
     |--/base
       |--reset.css
       |--variables.css
     |--/scss
       |--header.module.css
       |--mainNav.module.css
       |--footer.module.css
       |--elements.module.css
       // and so on...
We want to style the site’s header and footer, so let’s open up the Header.js and Footer.js components in the starter and replace the code with the following:
Now, let’s restart our development server. We should see the following, including a new customized header and footer. I used the same style from Learning Gatsby which is an online course by Morten Rand-Hendriksen (I am a fan!).
Screenshot showing modified header and footer styling.
There are many posts that compare the advantages and disadvantages of a decoupled WordPress and Jamstack site like the Gatsby examples we’ve covered. In my research, I realized that none of them are as exhaustive as what Chris already wrote in ”WordPress and Jamstack” where he compares everything, from performance and features, to the developer experience and build processes, and beyond.
I found the following articles draw some helpful conclusions on a variety of topics, including:
What’s the cost?
The general assumption is that Jamstack hosting is cheap, and cheaper than traditional LAMP stack hosting. But there’s actually quite a bit to consider and your actual costs might vary.
“How to Run Your WordPress Site On Local, Gatsby and Netlify for FREE!” (Nate Fitch): Nate’s take is that a headless WordPress setup like this might be a good option if the project is a static blog or a site that doesn’t require any interactions. For example, It wouldn’t take too much work to get images hosted on Cloudinary, or another CDN, but it would for large, interactive sites.
“WordPress and Jamstack” (Chris Coyier): There’s a specific section in here where Chris breaks down the pricing for different types of hosting for Jamstack sites and why a blanket statement like “Jamstack is cheaper” doesn’t fly because the actual cost depends on the site and its usage.
“Choosing between Netlify, Vercel and Digital Ocean” by (Zell Liew): Zell discusses his experience choosing a hosting plan. His take: If you have a small project, go with Netlify; if you have a larger project, use Digital Ocean.
Why go static at all?
Considering all the things you get for “free” in WordPress — think comments, plugins, integrations, etc. — you might wonder if it’s even worth trading in a server-side setup for a client-side solution. In his “Static or Not?” post, Chris breaks down the reasons why you’d want to choose one over the other.
How do we get commenting functionality?
We get native commenting right out of the box with WordPress. Yet, support for comments on a static site is a bit of a juggernaut. In “JAMstack Comments” here on CSS-Tricks, the author explains how dynamic comments can be implemented in a static site, like Gatsby, using Netlify services. I briefly touched on this in my previous article.
“A primer on JavaScript SEO for WordPress” (Jono Alderson): This exhaustive guide includes a section on how to integrate Yoast SEO into a headless architecture and the implications of relying on JavaScript for SEO. The bottom line is that theme and plugin developers shouldn’t worry much about the changing landscape of JavaScript and SEO as long as they continue following best practices. At the same time, they should be aware of what’s changing and adapt accordingly.
“Jason Bahl of WPGraphQL’s role in the operating system for the web” (YouTube): Here’s Jason again, this time discussing templating. He covers WPGraphQL’s role in the WordPress ecosystem and headless Gatsby sites, emphasizing that WPGraphQL is all about data exposure, just like the WordPress REST API. How the WPGraphQL exposes WordPress data in Gatsby and displays it in front-end React components is up to developers.
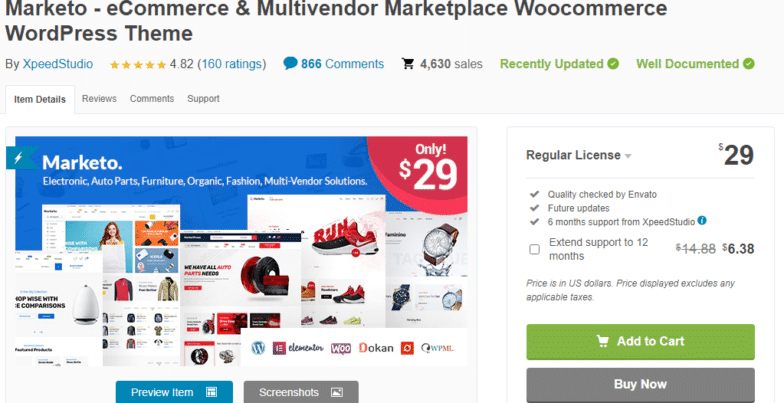
There are currently no Gatsby React templates that are geared toward non-developers but some agencies, like Gatsby WP Themes and the Themeforest marketplace, are beginning to fill the gap. For example, Gatsby WP Themes covers plugins for dynamic contents like MailChimp integration, using the Contact Form 7 plugin for forms, Yoast SEO, and more. Themeforest lists 30+ Gatsby templates, including the Gatsby – WordPress + eCommerce theme which gives you an idea of how far we can go with this sort of setup. Just remember: these are commercial sites, and much of what you’ll find has a cost attached to it.
My evolving personal take
If you recall, I ended my last article with a personal reflection on my journey to create a headless WordPress site that uses Gatsby as the front end. My initial take was less than a glowing review:
Based on my very limited experience, I think that currently available Gatsby WordPress themes are not ready for prime time use for users like me. Yeah, it is exciting to try something on the bleeding edge that’s clearly in the minds of many WordPress users and developers. At the same time, the constantly evolving work being done on the WordPress block editor, WPGraphQL and Gatsby Source WordPress plugins makes it difficult to predict where things are going and when it will settle into a state where it is safe to use in other contexts.
So, after all this my long journey to headless WordPress site, what is my take now? As an open-minded learner, my thoughts are still evolving. But I couldn’t agree more with what Chris says in his “Static or Not?” post:
It’s a perfectly acceptable and often smart choice to run a WordPress site. I think about it in terms of robustness and feature-readiness. Need e-commerce? It’s there. Need forms? There are great plugins. Need to augment how the CMS works? You have control over the types of content and what is in them. Need auth? That’s a core feature. Wish you had a great editing experience? Gutenberg is glorious.
I am a WordPress enthusiast and I love WordPress as a CMS. However, as a technological learning challenge, I have not given up yet to have a decoupled WordPress site as a personal project.
I must admit that learning to create a decoupled Gatsby site with WordPress has continued to be frustrating. I acknowledge that any modern technology stack is not “a cup of tea” for many WordPress users. Gatsby has steep learning curve as these stacks are targeted for experienced React and JavaScript developers.
Self-learning a new technology can be a frustrating experience. Learning Gatsby is especially frustrating if we (including yours truly) happen to lack experience with Node, React, JavaScript and, most importantly, GraphQL. My learning project sites would break because of some dependency and fixing it might take me several days of research. I sometimes wonder if the trouble is worth the outcome. Don’t get me wrong; my frustration is with my own lack of experience, not the frameworks themselves (because they are amazing).
Even experienced developers like David Cramer and Jared Palmer find using Gatsby and GraphQL frustrating and echo some of the same sentiments that we beginners face when using GraphQL. I couldn’t agree more with David who writes:
It’s a static website generator. It literally does not need GraphQL all over the place. While there are few instances in the real world where that is valuable, it shouldn’t require a GraphQL API to read objects that are already in memory.
GraphQL is an opinionated query language API and its specification changes frequently. Indeed, most of the discussion in the WPGraphQL Slack are related to queries.
While working on this project, I came cross the Frontity React Framework while reading an article on CSS-Tricks. It fetches all WordPress data with the REST API without writing a single query. That seems to be a better option, at least for my use case. Additionally, it appears to be a much simpler alternative. In my brief experience with it, I didn’t have to deal with any dependency or library issues at all. Frontity’s themes concept is so WordPress-y and provides excellent tutorials.
I am currently exploring whether the Frontity framework would be a better option for my decoupled project site and will share my experience in a future article.
Resources
Gatsby feels like it is targeted at experienced React and JavaScript developers, not for beginners like me! The gatsby-source-wordpress and gatsby-source-wpgraphql plugins do an excellent job of exposing WordPress data into Gatsby sites, but the rest is up to users to present the data on the front end using your framework of choice: React, Vue, Next, etc.
A lack of sound knowledge of React and JavaScript is the main hurdle for beginners. The Gatsby community fills a lot of these gaps, and there are a lot of resources available to keep learning and exploring.
Gatsby Conference 2021 talks
Two workshop talks from the recent 2021 Gatsby Conference were related to Gatsby WordPress sites. In one, Jason Bahl hosts a workshop that walks through how to create a Gatsby blog powered by WordPress data, including support the Yoast SEO plugin, and how to deploy the site to Gatsby Cloud.
Both talks are good, especially if you learn better with hands-on experience. I also found this Matt Report podcast episode with Jason Bahl where Jason answers basic questions that are geared toward beginners.
Tutorial courses
Morten Rand-Hendriksen has an excellent course on LinkedIn Learning that uses the Gatsby Source WordPress plugin. If you are interested in more hands-on experience making a customized site that expands on the two Gatsby starters we covered, this course is great because in teaches how to create a complete working site, complete with a dropdown header navigation, footer menus, posts, pages, categories, tags, and page navigation.
Check that out, a homepage, post template, categories, tags, a header that includes navigation… there’s a lot going on here!
At the time I’m writing this, there are ten Gatsby starters for WordPress. As we mentioned earlier, only Gatsby Starter WordPress Twenty Twenty is based on the latest version of the Gatsby Source WordPress plugin; the rest are version 3.
Thanks for reading. I am always interested to know how fellow WordPress users who lack heavy technical experience like me are using this plugin. If you have any feedback, please feel free to post them in the comments.
I’m afraid I have to start this with a whole backstory, as the journey here is the point, not so much the theme.
A fella wrote to me a while back outlining a situation he was in. His company has a bunch of WordPress sites for public radio, many of which are essentially homes for podcasts. There is one specific bit of functionality he thought would be ideal for them all: to have a “pinned” audio player. Like you could play a podcast, then continue navigating around the site without that podcast stopping.
This is somewhat tricky to pull off in WordPress, because WordPress does full page reloads like any other regular website not doing anything special with link handling or history manipulation. When a page reloads, any audio on the page stops playing. That’s just how the web works.
So how would you pull it off on a WordPress site? Well, you could make it a headless WordPress site and rebuild the entire front-end as a Single Page App. Sounds fun to me, but I’d be hesitant to make that call just for this one thing.
What else could you do? You could find a way to make the page never reload. I remember doing this on a little static site 10 years ago, but that wasn’t a full blown WordPress site and I didn’t even bother updating the URL back then.
What if you did this…
Intercept internal link clicks
Ajax’d the content from that URL
Replaced the content on the page with that new content
That’s not far off from being literally functional. You’d wanna watch for a popstate event to deal with the back button, but that’s only a few more lines.
In this hypothetical world, you’d lay out the site like:
So all that <main> content gets swapped out, the URL changes, but your <audio> player is left alone to keep playing in peace. You’d write more JavaScript to give people a way to update what podcast is playing and such.
Turns out there is more to think about here though. Are any inline scripts on the content going to run? What about updating the <title> too? There are enough edge concerns you probably will get annoyed dealing with it.
I wanted to have a play with this stuff, so I tossed together a WordPress theme and reached for Turbo instead of hand-writing something. Turbo (the new version of Turbolinks) is designed just for this. It’s a JavaScript library you drop on the page (no build process, no config) and it just works. It intercepts internal link clicks, Ajax’s for new content, etc. But it has this interesting feature where if you put a data-turbo-permanent attribute on an HTML element, it will persist it across that reload. So I did that for the audio player here.
Here’s the thing though.
I just don’t have time to finish this project properly. It was fun to have a play, but my interest in it has kinda petered out. So I’ll leave it alone for now:
It almost works, minus one glaring bug that the audio stops playing on the first navigation, then works after that. I’m sure it’s fixable, but I just don’t have much skin in this game. I figure I’ll just bow out and leave this code around for someone to pick up if it’s useful for them.
Another thing at play here is that Turbo is from Basecamp, and Basecamp has rather imploded recently making it not feel great to be using their software. Exacerbated by the fact that Sam Stephenson wrote 75% of Turbo and has said he won’t be touching it (or other related projects) unless the software is moved to its own foundation. Turbo was already in a shaky place since it seemed buggy compared to Turbolinks, and now is on very gnarly ground.
Typically, a single favicon is used across a whole domain. But there are times you wanna step it up with different favicons depending on context. A website might change the favicon to match the content being viewed. Or a site might allow users to personalize their theme colors, and those preferences are reflected in the favicon. Maybe you’ve seen favicons that attempt to alert the user of some event.
Multiple favicons can technically be managed by hand — Chris has shown us how he uses two different favicons for development and production. But when you reach the scale of dozens or hundreds of variations, it’s time to dynamically generate them.
This was the situation I encountered on a recent WordPress project for a directory of colleges and universities. (I previously wrote about querying nearby locations for the same project.) When viewing a school’s profile, we wanted the favicon to use a school’s colors rather than our default blue, to give it that extra touch.
With over 200 schools in the directory and climbing, we needed to go dynamic. Fortunately, we already had custom meta fields storing data on each school’s visual identity. This included school colors, which were being used in the stylesheet. We just needed a way to apply these custom meta colors to a dynamic favicon.
In this article, I’ll walk you through our approach and some things to watch out for. You can see the results in action by viewing different schools.
Each favicon is a different color in the tabs based on the school that is selected.
SVG is key
Thanks to improved browser support for SVG favicons, implementing dynamic favicons is much easier than days past. In contrast to PNG (or the antiquated ICO format), SVG relies on markup to define vector shapes. This makes them lightweight, scaleable, and best of all, receptive to all kinds of fun.
The first step is to create your favicon in SVG format. It doesn’t hurt to also run it through an SVG optimizer to get rid of the cruft afterwards. This is what we used in the school directory:
Hooking into WordPress
Next, we want to add the favicon link markup in the HTML head. How to do this is totally up to you. In the case of WordPress, it could be added it to the header template of a child theme or echo’d through a wp_head() action.
Here we’re checking that the post type is school, and grabbing the school’s color metadata we’ve previously stored using get_post_meta(). If we do have a color, we pass it into favicon.php through the query string.
From PHP to SVG
In a favicon.php file, we start by setting the content type to SVG. Next, we save the color value that’s been passed in, or use the default color if there isn’t one.
Then we echo the large, multiline chunk of SVG markup using PHP’s heredoc syntax (useful for templating). Variables such as $color are expanded when using this syntax.
Finally, we make a couple modifications to the SVG markup. First, classes are assigned to the color-changing elements. Second, a style element is added just inside the SVG element, declaring the appropriate CSS rules and echo-ing the $color.
Instead of a <style> element, we could alternatively replace the default color with $color wherever it appears if it’s not used in too many places.
With that, you’ve got a dynamic favicon working on your site.
Security considerations
Of course, blindly echo-ing URL parameters opens you up to hacks. To mitigate these, we should sanitize all of our inputs.
In this case, we‘re only interested in values that match the 3-digit or 6-digit hex color format. We can include a function like WordPress’s own sanitize_hex_color_no_hash() to ensure only colors are passed in.
function sanitize_hex_color( $color ) {
  if ( '' === $color ) {
    return '';
  }

  // 3 or 6 hex digits, or the empty string.
  if ( preg_match( '|^#([A-Fa-f0-9]{3}){1,2}$|', $color ) ) {
    return $color;
  }
}

function sanitize_hex_color_no_hash( $color ) {
  $color = ltrim( $color, '#' );

  if ( '' === $color ) {
    return '';
  }

  return sanitize_hex_color( '#' . $color ) ? $color : null;
}
You’ll want to add your own checks based on the values you want passed in.
Caching for better performance
Browsers cache SVGs, but this benefit is lost for PHP files by default. This means each time the favicon is loaded, your server’s being hit.
To reduce server strain and improve performance, it’s essential that you explicitly cache this file. You can configure your server, set up a page rule through your CDN, or add a cache control header to the very top of favicon.php like so:
In our tests, with no caching, our 1.5 KB SVG file took about 300 milliseconds to process on the first load, and about 100 milliseconds on subsequent loads. That’s pretty lousy. But with caching, we brought this down to 25 ms from CDN on first load, and 1 ms from browser cache on later loads — as good as a plain old SVG.
Browser support
If we were done there, this wouldn’t be web development. We still have to talk browser support.
One caveat is that Firefox requires the attribute type="image/svg+xml" in the favicon declaration for it to work. The other browsers are more forgiving, but it‘s just good practice. You should include sizes="any" while you’re at it.
Safari doesn‘t support SVG favicons as of yet, outside of the mask icon feature intended for pinned tabs. In my experimentation, this was buggy and inconsistent. It didn’t handle complex shapes or colors well, and cached the same icon across the whole domain. Ultimately we decided not to bother and just use a fallback with the default blue fill until Safari improves support.
Fallbacks
As solid as SVG favicon support is, it‘s still not 100%. So be sure to add fallbacks. We can set an additional favicon for when SVG icons aren’t supported with the rel="alternative icon" attribute:
To make the site even more bulletproof, you can also drop the eternal favicon.ico in your root.
Going further
We took a relatively simple favicon and swapped one color for another. But taking this dynamic approach opens the door to so much more: modifying multiple colors, other properties like position, entirely different shapes, and animations.
For instance, here’s a demo I’ve dubbed Favicoin. It plots cryptocurrency prices in the favicon as a sparkline.
Implementing dynamic favicons like this isn’t limited to WordPress or PHP; whatever your stack, the same principles apply. Heck, you could even achieve this client-side with data URLs and JavaScript… not that I recommend it for production.
But one thing‘s for sure: we’re bound to see creative applications of SVG favicons in the future. Have you seen or created your own dynamic favicons? Do you have any tips or tricks to share?
Blocks in WordPress are great. Drop some into the page, arrange them how you like, and you’ve got a pretty sweet landing page with little effort. But what if the default blocks in WordPress need a little tweaking? Like, what if we could remove the alignment options in the Cover block settings? Or how about control sizing for the Button block?
There are plenty of options when it comes to extending the functionality of core blocks in WordPress. We can add a custom CSS class to a block in the editor, add a custom style, or create a block variation. But even those might not be enough to get what you need, and you find yourself needing to filter the core block to add or remove features, or building an entirely new block from scratch.
I’ll show you how to extend core blocks with filters and also touch on when it’s best to build a custom block instead of extending a core one.
A quick note on these examples
Before we dive in, I’d like to note that code snippets in this article are taken out of context on purpose to focus on filters rather than build tools and file structure. If I included the full code for the filters, the article would be hard to follow. With that said, I understand that it’s not obvious for someone who is just starting out where to put the snippets or how to run build scripts and make the whole thing work.
To make things easier for you, I made a WordPress plugin with examples from this article available on my GitHub. Feel free to download it and explore the file structure, dependencies and build scripts. There is a README that will help you get started.
Block filters in an nutshell
The concept of filters is not new to WordPress. Most of us are familiar with the add_filter() function in PHP. It allows developers to modify various types of data using hooks.
A simple example of a PHP filter could look something like this:
In this snippet, we create a function that receives a string representing a post title, then wrap it in a <strong> tag and return a modified title. We then use add_filter() to tell WordPress to use that function on a post title.
JavaScript filters work in a similar way. There is a JavaScript function called addFilter() that lives in the wp.hooks package and works almost like its PHP sibling. In its simplest form, a JavaScript filter looks something like this:
function filterSomething(something) {
  // Code for modifying something goes here.
  return something;
}

wp.hooks.addFilter( 'hookName', 'namespace', filterSomething );
Looks pretty similar, right? One notable difference is addFilter() has a namespace as a second argument. As per the WordPress Handbook, “Namespace uniquely identifies a callback in the the form vendor/plugin/function.” However, examples in the handbook follow different patterns: plugin/what-filter-does or plugin/component-name/what-filter-does. I usually follow the latter because it keeps the handles unique throughout the project.
What makes JavaScript filters challenging to understand and use is the different nature of what they can filter. Some filter strings, some filter JavaScript objects, and others filter React components and require understanding the concept of Higher Order Components.
On top of that, you’ll most likely need to use JSX which means you can’t just drop the code into your theme or plugin and expect it to work. You need to transpile it to vanilla JavaScript that browsers understand. All that can be intimidating at the beginning, especially if you are coming from a PHP background and have limited knowledge of ES6, JSX, and React.
But fear not! We have two examples that cover the basics of block filters to help you grasp the idea and feel comfortable working with JavaScript filters in WordPress. As a reminder, if writing this code for the Block Editor is new to you, explore the plugin with examples from this article.
Without any further ado, let’s take a look at the first example.
Removing the Cover block’s alignment options
We’re going to filter the core Cover block and remove the Left, Center, Right, and Wide alignment options from its block settings. This may be useful on projects where the Cover block is only used as a page hero, or a banner of some sort and does not need to be left- or right-aligned.
We’ll use the blocks.registerBlockType filter. It receives the settings of the block and its name and must return a filtered settings object. Filtering settings allows us to update the supports object that contains the array of available alignments. Let’s do it step-by-step.
We’ll start by adding the filter that just logs the settings and the name of the block to the console, to see what we are working with:
Let’s break it down. The first line is a basic destructuring of the wp.hooks object. It allows us to write addFilter() in the rest of the file, instead of wp.hooks.addFilter(). This may seem redundant in this case, but it is useful when using multiple filters in the same file (as we’ll get to in the next example).
Next, we defined the filterCoverBlockAlignments() function that does the filtering. For now, it only logs the settings object and the name of the block to the console and returns the settings as is.
All filter functions receive data, and must return filtered data. Otherwise, the editor will break.
And, lastly, we initiated the filter with addFilter() function. We provided it with the name of the hook we are going to use, the filter namespace, and a function that does the filtering.
If we’ve done everything right, we should see a lot of messages in the console. But note that not all of them refer to the Cover block.
This is correct because the filter is applied to all blocks rather than the specific one we want. To fix that, we need to make sure that we apply the filter only to the core/cover block:
function filterCoverBlockAlignments(settings, name) {
  if (name === 'core/cover') {
    console.log({ settings, name });
  }
  return settings;
}
With that in place, we should see something like this now in the console:
Don’t worry if you see more log statements than Cover blocks on the page. I have yet to figure out why that’s the case. If you happen to know why, please share in the comments!
And here comes the fun part: the actual filtering. If you have built blocks from scratch before, then you know that alignment options are defined with Supports API. Let me quickly remind you how it works — we can either set it to true to allow all alignments, like this:
supports: {
  align: true
}
…or provide an array of alignments to support. The snippet below does the same thing, as the one above:
I’d like to pause here to draw your attention to the assign and merge lodash methods. We use those to create and return a brand new object and make sure that the original settings object remains intact. The filter will still work if we do something like this:
/* 👎 WRONG APPROACH! DO NOT COPY & PASTE! */
settings.supports.align = ['full'];
return settings;
…but that is an object mutation, which is considered a bad practice and should be avoided unless you know what you are doing. Zell Liew discusses why mutation can be scary over at A List Apart.
Going back to our example, there should now only be one alignment option in the block toolbar:
I removed the “center” alignment option because the alignment toolbar allows you to toggle the alignment “on” and “off.” This means that Cover blocks now have default and “Full width” states.
This wasn’t hard at all, right? You are now equipped with a basic understanding of how filters work with blocks. Let’s level it up and take a look at a slightly more advanced example.
Adding a size control to the Button block
Now let’s add a size control to the core Button block. It will be a bit more advanced as we will need to make a few filters work together. The plan is to add a control that will allow the user to choose from three sizes for a button: Small,Regular, and Large.
The goal is to get that new “Size settings” section up and running.
It may seem complicated, but once we break it down, you’ll see that it’s actually pretty straightforward.
1. Add a size attribute to the Button block
First thing we need to do is add an additional attribute that stores the size of the button. We’ll use the already familiar blocks.registerBlockType filter from the previous example:
The difference between what we’re doing here versus what we did earlier is that we’re filtering attributes rather than the supports object. This snippet alone doesn’t do much and you won’t notice any difference in the editor, but having an attribute for the size is essential for the whole thing to work.
2. Add the size control to the Button block
We’re working with a new filter, editor.BlockEdit. It allows us to modify the Inspector Controls panel (i.e. the settings panel on the right of the Block editor).
This may look like a lot, but we’ll break it down and see how straightforward it actually is.
The first thing you may have noticed is the createHigherOrderComponent construct. Unlike other filters in this example, editor.BlockEdit receives a component and must return a component. That’s why we need to use a Higher Order Component pattern derived from React.
In its purest form, the filter for adding controls looks something like this:
This will do nothing but allow you to inspect the <BlockEdit /> component and its props in the console. Hopefully the construct itself makes sense now, and we can keep breaking down the filter.
This is done so we can use name, setAttributes, and size in the scope of the filter, where:
size is the attribute of the block that we’ve added in step 1.
setAttributes is a function that lets us update the block’s attribute values.
name is a name of the block. which is core/button in our case.
Next, we avoid inadvertantly adding controls to other blocks:
if (name !== 'core/button') {
  return <BlockEdit {...props} />;
}
And if we are dealing with a Button block, we wrap the settings panel in a <Fragment /> (a component that renders its children without a wrapping element) and add an additional control for picking the button size:
return (
  <Fragment>
    <BlockEdit {...props} />
    {/* Additional controls go here */}
  </Fragment>
);
Finally, additional controls are created like this:
Again, if you have built blocks before, you may already be familiar with this part. If not, I encourage you to study the library of components that WordPress comes with.
At this point we should see an additional section in the inspector controls for each Button block:
We are also able to save the size, but that won’t reflect in the editor or on the front end. Let’s fix that.
3. Add a size class to the block in the editor
As the title suggests, the plan for this step is to add a CSS class to the Button block so that the selected size is reflected in the editor itself.
We’ll use the editor.BlockListBlock filter. It is similar to editor.BlockEdit in the sense that it receives the component and must return the component; but instead of filtering the block inspector panel, if filters the block component that is displayed in the editor.
I’m using the classnames utility here, and it’s not a requirement — I just find using it a bit cleaner than doing manual concatenations. It prevents me from worrying about forgetting to add a space in front of a class, or dealing with double spaces.
4. Add the size class to the block on the front end
All we have done up to this point is related to the Block Editor view, which is sort of like a preview of what we might expect on the front end. If we change the button size, save the post and check the button markup on the front end, notice that button class is not being applied to the block.
To fix this, we need to make sure we are actually saving the changes and adding the class to the block on the front end. We do it with blocks.getSaveContent.extraProps filter, which hooks into the block’s save() function and allows us to modify the saved properties. This filter receives block props, the type of the block, and block attributes, and must return modified block props.
import classnames from 'classnames';
const { assign } = lodash;
const { addFilter } = wp.hooks;

/**
 * Add size class to the block on the front end
 *
 * @param  {Object} props      Additional props applied to save element.
 * @param  {Object} block      Block type.
 * @param  {Object} attributes Current block attributes.
 * @return {Object}            Filtered props applied to save element.
 */
function addSizeClassFrontEnd(props, block, attributes) {
  if (block.name !== 'core/button') {
    return props;
  }

  const { className } = props;
  const { size } = attributes;

  return assign({}, props, {
    className: classnames(className, size ? `has-size-${size}` : ''),
  });
}

addFilter(
  'blocks.getSaveContent.extraProps',
  'intro-to-filters/button-block/add-front-end-class',
  addSizeClassFrontEnd,
);
In the snippet above we do three things:
Check if we are working with a core/button block and do a quick return if we are not.
Extract the className and size variables from props and attributes objects respectively.
Create a new props object with an updated className property that includes a size class if necessary.
Here’s what we should expect to see in the markup, complete with our size class:
If you are building a custom theme, you can include these front-end styles in the theme’s stylesheet. I created a plugin for the default Twenty Twenty One theme, so, in my case, I had to create a separate stylesheet and include it using wp_enqueue_style(). You could just as easily work directly in functions.php if that’s where you manage functions.
Similar to the front end, we need to make sure that buttons are properly styled in the editor. We can include the same styles using the enqueue_block_editor_assets action:
We should now should have styles for large and small buttons on the front end and in the editor!
As I mentioned earlier, these examples are available in as a WordPress plugin I created just for this article. So, if you want to see how all these pieces work together, download it over at GitHub and hack away. And if something isn’t clear, feel free to ask in the comments.
Use filters or create a new block?
This is a tricky question to answer without knowing the context. But there’s one tip I can offer.
Have you ever seen an error like this?
It usually occurs when the markup of the block on the page is different from the markup that is generated by the block’s save() function. What I’m getting at is it’s very easy to trigger this error when messing around with the markup of a block with filters.
So, if you need to significantly change the markup of a block beyond adding a class, I would consider writing a custom block instead of filtering an existing one. That is, unless you are fine with keeping the markup consistent for the editor and only changing the front-end markup. In that case, you can use PHP filter.
Speaking of which…
Bonus tip: render_block()
This article would not be complete without mentioning the render_block hook. It filters block markup before it’s rendered. It comes in handy when you need to update the markup of the block beyond adding a new class.
The big upside of this approach is that it won’t cause any validation errors in the editor. That said, the downside is that it only works on the front end. If I were to rewrite the button size example using this approach, I would first need to remove the code we wrote in the fourth step, and add this:
This isn’t the cleanest approach because we are injecting a CSS class using str_replace() — but that’s sometimes the only option. A classic example might be working with a third-party block where we need to add a <div> with a class around it for styling.
Wrapping up
WordPress block filters are powerful. I like how it allows you to disable a lot of unused block options, like we did with the Cover block in the first example. This can reduce the amount of CSS you need to write which, in turn, means a leaner stylesheet and less maintenance — and less cognitive overhead for anyone using the block settings.
But as I mentioned before, using block filters for heavy modifications can become tricky because you need to keep block validation in mind.
That said, I usually reach for block filters if I need to:
disable certain block features,
add an option to a block and can’t/don’t want to do it with custom style (and that option must not modify the markup of the block beyond adding/removing a custom class), or
modify the markup only on the front end (using a PHP filter).
I also usually end up writing custom blocks when core blocks require heavy markup adjustments both on the front end and in the editor.
If you have worked with block filters and have other thoughts, questions, or comments, let me know!
Here’s Ashley Rich at Delicious Brains writing about all the layers of caching that are relevant to a WordPress site. I think we all know that caching is complicated, but jeez, it’s a journey to understand all the caches at work here. The point of cache being speed and reducing burden on the worst bottlenecks and slowest/busiest parts of a web stack.
Here’s my own understanding:
Files can be cached by the browser. This is the fastest possible cache as no network request happens at all. Assets like images, CSS, and JavaScript are often cached this way because they don’t change terribly frequently, but you have to make sure you’re telling browsers that it’s OK to do this and have a mechanism in place to break that cache if you need to (e.g. by changing file names). You very rarely cache the HTML this way, as it changes the most and file-name-cache-busting of HTML seems more tricky than it’s worth.
Files can be cached at the CDN level. This is great because even though network traffic is happening, CDN servers are very fast and likely geographically closer to users than your origin server. If users get files from here, they never even trouble your origin server. You’ll need a way to break this cache as well, which again is probably through changing file names. You might cache HTML at this level even without changing file names if you have a mechanism to clear that cache globally when content changes.
The origin server might cache built HTML pages. On a WordPress site, the pages are built with PHP which probably triggers MySQL queries. If the server can save the result of the things that have already executed, that means it can serve a “static” file as a response, which it can do much faster than having to run the PHP and MySQL. That’ll work for logged out users, who all get the same response, but not for logged in users who have dynamic content on the page (like the WordPress admin bar).
The database has its own special caching. After a MySQL query is executed, the results can be saved in an Object Cache, meaning the same request can come from that cache instead of having to run the query again. You get that automatically to some degree, but ideally it gets wired up to a more persistent store, which you do not get automatically
Phew. It gets a little easier with Jamstack since your pages are prebuilt and CDN-hosted already, and in the case of Netlify, you don’t even have to worry about cache busting.
But even as complex as this is, I don’t worry about it all that much. This WordPress site uses Flywheel for hosting which deals with the database and server-level caching, I have Cloudflare in front of it with special WordPress optimization for the CDN caching, and roll-my-own file-name cache busting (I wish this part was easier). I’d certainly trust SpinupWP to get it right too, given Ashley’s great writeup I’m linking to here.
Starting an online business or taking your current business online is no easy feat—you wear a lot of hats to ensure your site or the sites you build are high-performing and user-friendly!
One of the best ways WordPress users can boost site experience and functionality is by tapping into the expansive ecosystem of WordPress plugins available today. From support and chat features to SEO and eCommerce optimization, there are a ton of plugins to choose from.
That said, it can certainly be overwhelming to work your way through the tens of thousands of plugin options out there—and choosing a low-quality plugin, or one that’s not the right fit for your site can create problems down the road rather than solving them.
So which plugins are the best fit?
Rather than spending hours researching the basics, we’ve compiled a list of a few must-have plugins that are great for every business site.
What are WordPress plugins and why do they matter?
If this is your first time building a website, you might not be 100% sure what a WordPress plugin is or does—and that’s okay! A WordPress plugin is an application of code that essentially adds functionality or a specific feature to your website.
There are nearly 60,000 plugins available in the WordPress directory, and that doesn’t take into account the thousands of additional, premium plugins available via specific plugin authors. It’s common for developers or web designers to have several plugins installed to enable a range of basic to professional features such as having a contact page, spam checkpoints, cart check-out, traffic conversion—the list goes on and on!
The main role of using a plugin is to help get the most out of your website for you and your visitors. By giving users the best experience and having the tools to build and nurture that customer relationship, your results will speak for themselves.
12 must-have WordPress plugins for your business site
Having too many plugins will weaken your site performance and negatively impact your overall user experience. Hence, it’s important to choose your plugins wisely. This nifty list checks all the plugin boxes for building and running a thriving business site.
Jetpack is a “jack-of-all-trades” plugin that offers a convenient and easy way to get started in using, managing, and customizing your website. It jacks your site with a handful of robust features, including analytics, content tools, social sharing, and more.
From powerful tools that help you customize the design of your site to intuitive services that help boost your marketing efforts, it’s packed with options to optimize your business site.
It’s arguably one of the most versatile plugins available which is why there are more than five million active plugin installations Jetpack to date!
Both you and your potential clients’ credibility is on the line and nothing ruins it faster than spam!
As the name suggests, this top-notch anti-spam plugin will keep your comments clean and free of malicious content. It checks every comment on your site to identify whether or not it’s spam.
If you wanted to be more hands-on with checking, you can adjust the settings so it enables you to manually mark comments as spam, or approve comments that may have accidentally been flagged.
There are major advantages to having a WordPress translation plugin! First, you’ll expand your potential audience by reaching them in the comforts of their own language. Second, introducing additional languages improves your chances of ranking for a specific region and in several languages which will allow even more traffic to flock to your site.
It translates all your WordPress site content including posts, pages, categories, and tags into more than 40 languages.
Design your website with ease thanks to the Elementor plugin (no coding hassle)!
This live page builder allows you to design WordPress sites in real-time and view the updates. With an easy-to-use, drag-and-drop interface, you can effortlessly create the website of your dreams with advanced design capabilities.
This plugin packs a double-punch when it comes to visual website curb appeal and functionality!
Unlock access to a comprehensive collection of visual and functional shortcodes for your WordPress Dashboard editor!
Installing too many plugins can bog down your site performance so Shortcodes Ultimate provides strategic codes so you can still add the site elements you want without compromising quality.
This shortcodes WordPress plugin offers a list of 50+ shortcodes that can be used to create elements like QR codes, galleries, buttons, tabs, headings, testimonials, progress bars, and many more.
The plugin Tidio is a live chat service that offers easy and intuitive chat box systems, even offering the help of chatbots too! When you go offline, Tidio allows you to collect messages from your site visitors to follow up as soon as you’re back.
A feature such as live chat is advantageous because it can generate more customer leads for your business!
HubSpot will become your new marketing insights bestie.
This powerful marketing WordPress plugin packs a lot of neat features into one as a Customer Relationship Management system. Turn website visitors into new leads by adding them into forms (thanks to popups) and using the email marketing tools to nurture them into sales.
The handy analytics feature of the plugin helps track growth and measure KPI progress. Building a business website isn’t easy so this helps ensure you’re getting a return on the investment.
I can’t recommend it enough for anyone trying to grow their online business.
Looking for more WordPress CRM plugins? Check out this article!
It’s no secret that there’s a lot of competition in the world of search engines. Yoast is the SEO WordPress plugin that’s here to help visitors find your website through the thick of it so the Google fairies rank your site higher.
SEO is so important to optimize every post and page for maximum exposure! Doing so will ensure you’re getting the most (and more) out of your website traffic.
While you’re editing content, this plugin will help you preview how it’ll display in search engine results and also make suggestions to increase rankings.
Content is king and Yoast is there to get your business on top (of the search results list)!
Another awesome plugin for lead generation is OptinMonster.
Even with the rise of social media and other digital touchpoints, email marketing remains the most effective way to nurture leads and turn them into customers. People who buy products marketed through email spend 138% more than those who do not receive email offers!
This plugin’s specialty is to strategically grow your email marketing list using pop-ups and content upgrades.
You’ll be able to customize the look of each opt-in and then integrate them with email providers for seamless list building. Their dashboard provides plenty of data, so you’ll always be informed about which design decisions matter most!
Okay, maybe you’re seeing a pattern here — analytics are crucial(!) for determining the opportunities to get the most out of your business site.
Google Analytics for WordPress by MonsterInsights tells you what is and isn’t working for your business strategy!
Take the guesswork out of your business by displaying your Google Analytics data right in WordPress. By housing everything in the same spot, you’ll be able to keep these stats front and center every time you log in to make a change, and in turn, monitor how those changes affect your site traffic.
The plugin is easy to install and features an intuitive dashboard so there’s no technical or coding background required!
Wield the freedom to run your business the way you see fit thanks to this plugin!
WooCommerce is a flexible, open-source eCommerce plugin to integrate your content and commerce needs. Fresh off the download, this plugin offers a range of robust features from turnkey solutions to advanced, customizable setups. Learn more about WooCommerce features here.
It offers essential amenities such as product, cart, and checkout pages with secure payment systems. The plugin is also stocked with several logistic feature options like shipping arrangements, tax calculations, and label printing. WooCommerce is also compatible with other popular plugins/apps like Google Analytics, MailChimp, and Facebook.
Take it a step further with paid plugin extensions and you can accept bookings, open memberships, create subscription boxes, and lots more!
Jumpstart your business site now
That’s a wrap on the must-haves list! I’ve made the whole process easy by giving you the lowdown on which plugins are essential for a successful business site. From security and malware scans, to analytics and sales, you’re now equipped with the best WordPress plugin recommendations for your site to thrive and maintain with basic housekeeping.
With these handy plugins in your toolbelt, I’m confident you can design, build, and manage the most badass website of your business dreams!
Let us know if you have more WordPress plugin recommendations in the comments!
We researched, tested, and compiled the ultimate “bread and butter” WordPress plugins every web designer should be using! Whether you’re in the market for a new anti-spam, page-builder, or SEO plugin, this comprehensive list offers a bit of every plugin for your WordPress needs. Loved by us, our clients, and our client’s clients, these are 20 of the best plugins for WordPress designers. Read the entire list here!
Using a well-built theme is a prerequisite for just about any kind of website today, but this is especially true when it comes to sites with eCommerce functionality.
For eCommerce sites, presenting a great-looking storefront that loads fast and helps users find what they’re looking for is the key to higher conversions. Using the right theme can help you build these types of experiences by boosting the overall design and aesthetic of your sites, as well as positively affecting speed and performance.
There are many factors to consider when choosing a theme for your eCommerce site but compatibility with certain plugins (like WooCommerce) is a good place to start. For example, if you sell online courses through a plugin like LearnDash, your theme must be compatible with LearnDash and WooCommerce.
Among the variety of theme choices available today, it’s easy to overlook some of the best options, so we’re shining a light on 10 of the best themes for exceptional eCommerce performance, along with key features and pricing for each.
It is safe to say Divi is one of the most popular themes for WordPress websites. The Divi theme’s versatility allows site owners to customize it according to their needs, which compels many users to opt for this choice. In addition, the Divi theme is updated regularly to ensure a premium user experience.
Key Features Of Divi
Divi has an ample number of ready-made templates for different kinds of websites.
Divi Builder allows users to tweak the layout of their website and create customizable themes.
Divi has an exceptional customer support system, which sets it apart from many other themes.
Pricing
Divi offers an $89 annual plan or a lifetime access plan for $249:
Another popular theme that offers extensive, impressive features along with impeccable performance is Astra. This theme has both free and premium versions, and while the free version has many features, the premium features allow you even more control over the look and feel of your website.
Key features of Astra
Astra is one of the top themes when it comes to the loading speed.
Astra is compatible with all essential WordPress plugins like Gutenberg and Beaver Builder.
The premium version of Astra offers a wide range of layouts.
It is easily understandable for new users due to its friendly interface.
Pricing
Astra currently offers the following, highly affordable plans:
It’s tough to beat Neve when it comes to ratings. This theme has an impressive rating of 5 stars, all thanks to its incredible functionality. Initially, Neve only offered a free version of its theme, but its developers have recently released a premium version for an even better experience.
Key features of Neve
Neve lets users customize the style, layout, footer, and header of their website without any complex methods.
Neve is as light as 200KB along with WordPress. Its light weight is one of the things people love most about this theme.
Neve is integrated with Elementor as well as other plugins that are essential for eCommerce site owners.
Neve includes sAMP support to accelerate loading speed on mobile devices.
Pricing
Neve offers three different plans, which are priced as follows:
Flatsome first launched in 2013, and the theme has become increasingly popular ever since. Today, it has a rating of 4.8 and is ranked among the best-selling themes on Theme Forest. It has a customer base of 153,000 at the time of this article’s writing, and that number keeps growing every day.
Key features of Flatsome
Flatsome has a library filled with free, ready-to-use demos that include pre-made checkout pages and homepages.
Flatsome is a multi-purpose theme that helps increase the loading speed of your website.
Thanks to the intuitive UX builder that comes along with the Flatsome theme, users can make edits on their websites conveniently.
It offers various filter selections, catalog options to display products, extensive designing for product pages, and a quick view for products.
Pricing
Find the current pricing for plans offered by Flatsome below:
If you want a wide variety of ready-to-use designs, then Metro is your best theme option. Metro themes promise an impeccable user experience and they’ll help your website look its best without any tedious procedures or hefty charges. Additionally, Metro supports both free and premium plugins for users with different needs.
Key Features Of Metro
Websites built with Metro fit perfectly on mobile screens.
Excellent image quality across both desktop and mobile
If you’re looking for faster website speeds to facilitate rapid conversions, then Shoptimizer has your back. Page load speeds are way faster with Shoptimizer than compared to many other themes. Furthermore, it includes numerous features that allow you to build smooth shopping experiences for site visitors.
Key Features Of Shoptimizer
Its loading speed is remarkable and hard to find anywhere else.
Shoptimizer takes all measures to keep conversion rates up.
It offers a “slide cart” feature for buyers’ convenience.
Checkout page is straightforward and free from distractions.
Hongo theme is all you need to start a kick-ass eCommerce website. With its remarkable feature set, this theme has the potential to make your website look a million bucks.
Key features of Hongo
Hongo has demos explicitly designed for eCommerce websites.
If you’re looking for a theme that’s straightforward, SEO-friendly, and responsive you need to get familiar with Marketo. This theme is ideal for multi-vendor stores and it has exceptional performance.
Key Features Of Marketo
It consists of a vertical menu which is ideal for eCommerce websites.
With a rating of 4.9 on ThemeForest, Porto is here to solve all your theme-related issues. The Porto theme has been updated quite a few times to ensure a quality experience. You can take your website game up a few notches by opting for this theme.
Key features of Porto
It has a collection of 66 demos that users can use to test its capabilities.
It offers a good loading speed to help with search engine rankings.
It integrates easily with many popular plugins like Elementor.
It allows users to edit headers according to heir needs.
WoodMart has successfully entered 2021’s best-selling themes list. It has all the features an eCommerce business owner looks for in a WordPress theme and gives your website an ultimate makeover that can help you boost traffic.
Key features of WoodMart
It consists of free, ready-made demos for users looking for a quick solution
Clean codeg contributes to the theme’s overall responsiveness.
Users can customize their website layout and style effortlessly.
It helps increase your website’s ranking on Google’s first page.
Pricing
WoodMart is available at ThemeForest at the following price:
Conclusion
The type of theme you choose for your eCommerce website is directly tied to site design, performance, and ultimately, your conversion rate. For that reason, you should take the time it requires to choose the right theme for your needs. Designer and developer rates can be steep, but if you’re handling the design yourself, opting for a well-built, easily customizable theme will help reduce your costs considerably.
The themes mentioned in this article are the best ones for 2021, and any would be capable of creating a powerful eCommerce website. Check them out, try a few tutorials, and select the theme you think is best for your business!
The road to creating a responsive navigation menu in WordPress is open-ended. There are countless ways to do this thanks to the flexibility offered by WordPress.
Today, I’ll show you how to create a lean and mean responsive navigation menu. Lean because we are going to achieve all this in under 8 kilobytes, and mean because it will be an incredibly efficient navigation menu. We are simply going to mirror your current navigation menu so that you don’t have to maintain two different ones. By killing two birds with one stone, we’ll create one menu to rule them all.
Before we start, we suggest you have some basic front-end development knowledge. (We only require familiarity and not proficiency, so please don’t panic.) Basic HTML, CSS, jQuery, and WordPress knowledge would be ideal. This is a beginner to intermediate tutorial, as it involves modification of WordPress theme files.
You will also need access to the following WordPress theme files:
functions.php
header.php
footer.php
Style.css
Before making any modifications, please be sure to run a backup of your site, or test changes in a local environment first. You always want to have a way to revert to your original files.
We are going to use bigSlide.js, a tiny jQuery plugin for creating off-screen slide panels. On the plugin’s website, it is described as “a teeny tiny (~1kb compressed) jQuery plugin for creating off-screen slide panel navigation.” This is in line with our lean and mean responsive navigation goal.
2. Open functions.php in your preferred code editor. Search for wp_enqueue_script. You will likely see multiple instances, as wp_enqueue_script is the standard way of adding scripts to WordPress.
3. Just after the last instance of wp_enqueue_script, add the following snippet and save.
&amp;amp;amp;amp;amp;amp;lt;div id="page" class="hfeed site push"&amp;amp;amp;amp;amp;amp;gt;.
5. While still inside header.php search for site-navigation. This will either be a class or an id depending on your theme. In most WordPress themes, it should look something like this:
I have used a dark color scheme here, but feel free to change the colors to suit your needs.
This approach will work on almost all standard WordPress themes. But, due to the different use cases and header layouts out there, you may have to make a few adjustments.
Ultimately, the fundamentals remain the same. The rationale is that on a screen size of 900px or lower, you’ll hide the default main navigation and show the hamburger icon instead.
On clicking or tapping the hamburger icon, the menu we duplicated on the footer opens up as an app like side panel.
If you happen to get stuck, please leave a comment below. I will be more than happy to help. Happy coding!
Every year, WordPress gets stronger as an eCommerce platform. And today, from simple PayPal buttons to sophisticated full-featured eCommerce systems, WordPress is a serious online shop solution.
Although the plugins listed in this article are free inside the WordPress plugin repository, they also offer free and paid extensions for boosting their functionality.
Today, we’re going to look at the top free eCommerce plugins available for WordPress users. These plugins offer a range of features that fit a variety of eCommerce needs.
If you’re looking to quickly set up a simple eCommerce store without the need for a full eCommerce solution, WordPress Simple PayPal Shopping Cart is an excellent option.
This plugin allows you to easily sell physical and digital products or services without having to invest too much time and resources into getting your store up and running.
WordPress Simple PayPal Shopping Cart lets you upload and sell any media file (music and audio files, PDFs, images/photos, videos, and more), or sell tangible products such as T-shirts, hats, jewelry, gift items, or whatever you wish.
It adds a customizable “Add to Cart” button on your product posts and pages. You can also add your shopping cart to any post or page, or in the sidebar.
The plugin comes with basic shipping cost options, including free shipping capabilities.
Other WordPress Simple PayPal Shopping Cart features:
Responsive design
Coupons and discounts
See all orders received through the Order menu
Post-purchase emails and sales notifications
Custom checkout styles
Multiple currencies
Redirect customers after payment with custom return URL
Allows testing in PayPal sandbox
Very good support (video tutorials, documentation, and updates)
If your aim is to sell digital products, Easy Digital Downloads can help you get the job done straight from your WordPress website. There are many third-party platforms that help you sell digital products, but this plugin lets you handle it yourself.
Instead of trying to be a total eCommerce solution, Easy Digital Downloads puts its focus on selling digital products. So whether you’re trying to sell digital photography, software, ebooks, design, music, documents, or any other digital product, this is the eCommerce WordPress plugin you should look at first.
Installation and setup are easy and the plugin works with any theme. It comes with an intuitive interface and a great deal of flexibility for structuring and customizing your store.
Product creation is simple, as the plugin creates products as WordPress pages. With the use of shortcodes, products can be added to any page or post.
It also offers discounts, numerous payment gateways, simultaneous digital downloads, and the ability to sell bundled products.
And the Easy Digital Downloads shopping cart can be added to any page, post, or widget area.
I like that it provides license keys with downloaded digital products, allowing for proper licensing and activation of any software your customers purchase.
Other Easy Digital Downloads features:
Import products from another store
Users can view their purchase history from their account page
Set up an affiliate system and award commissions to your affiliate marketers
Set variable prices per product
Guest user checkout capability (as well as registered users)
One page checkout for higher conversions
Built-in reporting of earnings, downloads, customer and tax data, and more
Free plugin comes with basic support forum, videos, and documentation
eCommerce Product Catalog is not your typical out-of-the-box eCommerce plugin. Its main purpose is to help display an online catalog of your site’s products and services.
However, eCommerce Product Catalog offers extensions for added features and functionality, including a full-featured shopping cart, multiple image product galleries and sliders, fully customizable order forms, product quotes, payment gateways, and more. And it’s a mobile responsive WordPress plugin and highly customizable solution that works with any theme.
eCommerce Product Catalog also provides templates for easier creation of your product pages, along with the option to use custom CSS.
The plugin creates product information based on custom post types and allows you to add as many products to your catalog as you need. You can divide your products in your catalog by category, and add them to your website with shortcodes.
Through an intuitive drop and drag interface, you can also set the attributes and shipping options for each product.
The people at Ecwid offer an online software service that provides a fully functional eCommerce store for its users. The WordPress plugin for that service, Ecwid Ecommerce Shopping Cart, integrates with Ecwid, allowing WordPress users to take full advantage of its impressive power and features.
All you need to do is create a free account with Ecwid, and you’ll have the ability to integrate your Ecwid account with your WordPress site. From there, you can configure the feature set and functionality within Ecwid’s control panel (product management, shipping, payment, taxes, etc.), and set the look and feel of your store through the WordPress plugin.
I particularly like Ecwid Ecommerce Shopping Cart for its ability to mirror the same store on multiple platforms (e.g., WordPress, Facebook, eBay, Google Shopping) with just a snippet of code, while keeping the eCommerce data automatically synchronized between each platform. In other words, you can put your online store in as many different places as you want and manage it from one location.
Ecwid Ecommerce Shopping Cart comes with mobile responsive design and free mobile applications for iOS and Android for managing your store and accepting payments.
Ecwid’s free plan allows up to 10 products for your online store, so if your offerings are fairly limited, their free plan will fit the bill. On the other hand, if you need more, it’s definitely worth looking into their other plans. All of their plans (including the free plan) include unlimited storage, automatic backups, and automatic updates for every store.
In short, Ecwid provides WordPress users impressive features and an easy-to-use solution for selling both digital and physical products, with the ability to do so across multiple sites.
Other Ecwid Ecommerce Shopping Cart features:
Highly secure (PCI DSS Level 1 certified) and easy-to-use
Integrated advanced payment and shipping options
Secure HTTPS checkout
Store widgets (shopping cart, product search, product categories list)
WooCommerce is the most popular WordPress eCommerce plugin available today. Created by WooThemes, it’s also the most feature-rich and expandable WordPress eCommerce plugin ever.
Easy to install and set up, WooCommerce offers an onboarding wizard to get you up and running within a minute or two.
WooCommerce covers the gamut of needs for online shop owners. From the most basic setup to the most elaborate eCommerce store, it has the ability to scale to your unique needs. Out-of-the-box, it comes with enough features to meet the needs of most basic eCommerce stores.
It has the largest user base of any WordPress eCommerce plugin and is supported by numerous third-party developers. Currently, WooCommerce users have access to hundreds of free and premium plugins and themes—products specifically developed for WooCommerce. This ability to extend eCommerce functionality and features is unparalleled in the WordPress marketplace.
WooCommerce allows its users to sell both digital and physical products and services and works with any theme (although themes built for WooCommerce work best). In its basic installation, it accepts major credit cards, PayPal, bank transfers, and cash on delivery. With extensions, it can support over 140 payment gateways.
New products are added to your WooCommerce store by creating custom post types. The plugin supports the following product types: simple, variable, virtual, downloadable, grouped, and affiliate products.
WooCommerce also comes with extensive shipping options, including real-time shipping calculations and drop-shipping capabilities. It also offers inventory management, customer accounts, and a variety of tax configurations.
If you’re looking for hosting solutions geared specifically for WooCommerce, WP Engine’s eCommerce plans are optimized for Woo, and provide excellent upgrades for search functionality, speed and performance, as well as the overall look and feel of your online store.
Other WooCommerce features:
One page checkout
Bulk discounts
Ability to create pricing tiers (e.g., purchase quantity, memberships)
Show related products based on categories, tags, and linked products
Bulk editing of product details
Many built-in widgets for product display (e.g., best sellers, on sale, featured products)
Advanced payment and shipping options
Inventory management
Excellent sales reporting features
Very good documentation (user guides, codex, plugin forum, help desk)
That’s it for my recommendations for the top free eCommerce plugins for WordPress. Is your favorite WordPress eCommerce plugin on the list? Or do you have another eCommerce plugin that you’d like to share with us? Let us know in the comments!
We use cookies on our website to give you the most relevant experience by remembering your preferences and repeat visits. By clicking “Accept”, you consent to the use of ALL the cookies.
This website uses cookies to improve your experience while you navigate through the website. Out of these, the cookies that are categorized as necessary are stored on your browser as they are essential for the working of basic functionalities of the website. We also use third-party cookies that help us analyze and understand how you use this website. These cookies will be stored in your browser only with your consent. You also have the option to opt-out of these cookies. But opting out of some of these cookies may affect your browsing experience.
Necessary cookies are absolutely essential for the website to function properly. These cookies ensure basic functionalities and security features of the website, anonymously.
Cookie
Duration
Description
cookielawinfo-checkbox-analytics
11 months
This cookie is set by GDPR Cookie Consent plugin. The cookie is used to store the user consent for the cookies in the category "Analytics".
cookielawinfo-checkbox-functional
11 months
The cookie is set by GDPR cookie consent to record the user consent for the cookies in the category "Functional".
cookielawinfo-checkbox-necessary
11 months
This cookie is set by GDPR Cookie Consent plugin. The cookies is used to store the user consent for the cookies in the category "Necessary".
cookielawinfo-checkbox-others
11 months
This cookie is set by GDPR Cookie Consent plugin. The cookie is used to store the user consent for the cookies in the category "Other.
cookielawinfo-checkbox-performance
11 months
This cookie is set by GDPR Cookie Consent plugin. The cookie is used to store the user consent for the cookies in the category "Performance".
viewed_cookie_policy
11 months
The cookie is set by the GDPR Cookie Consent plugin and is used to store whether or not user has consented to the use of cookies. It does not store any personal data.
Functional cookies help to perform certain functionalities like sharing the content of the website on social media platforms, collect feedbacks, and other third-party features.
Performance cookies are used to understand and analyze the key performance indexes of the website which helps in delivering a better user experience for the visitors.
Analytical cookies are used to understand how visitors interact with the website. These cookies help provide information on metrics the number of visitors, bounce rate, traffic source, etc.
Advertisement cookies are used to provide visitors with relevant ads and marketing campaigns. These cookies track visitors across websites and collect information to provide customized ads.